Zapier - Creating new MySQL rows from Google Sheets rows
To integrate Zapier with ScaleGrid MySQL deployment, let's create a zap (aka Zapier workflow) where you connect your Scalegrid MySQL with Google Sheets. You can add new rows in your MySQL database’s table using Google Sheets without the hassle of manual setup. After you set up this MySQL Google Sheets integration, every time a new row is added to Google Sheets, a new row will be inserted automatically into the table. This is a great option for presenting database data to non-technical users.
How it works
- A new row is added to Google Sheets (Trigger - New Row)
- Check if the row already exists in MYSQL table or not (Action 1 - Find Row)
- If the row doesn't exist, Zapier inserts that new row to your MySQL database’s table (Action 2 - Add Row)
What you need
- A ScaleGrid account
- A MySQL database to connect with
- A MySQL user with read-write access to the database
- A Google account
Prerequisites
- Create a MySQL deployment at ScaleGrid.
- A database to connect with. For demonstration purposes, I'm using a sample database, "world" with the table "city", which has the following fields/columns in it:

- Create a MySQL database user with read-write access to the required database.
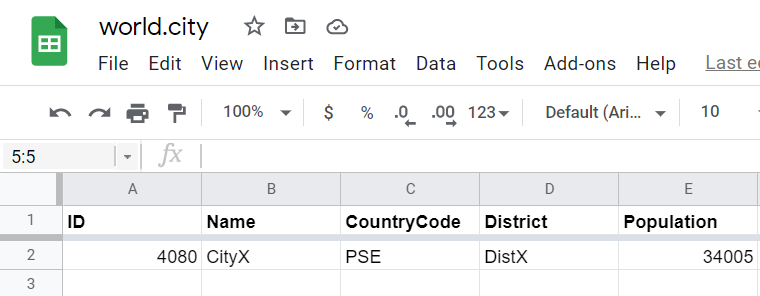
For demonstration, I have created a user “sgzapier”, that has read-write access to the “world” database. - Create a Google Sheet with column names same as column names in the database’s table and add a test row to it.
Configuration
Step 1 - Zapier Workflow Information
Go to the Zapier dashboard. Fill in the workflow information as just like in the image below.
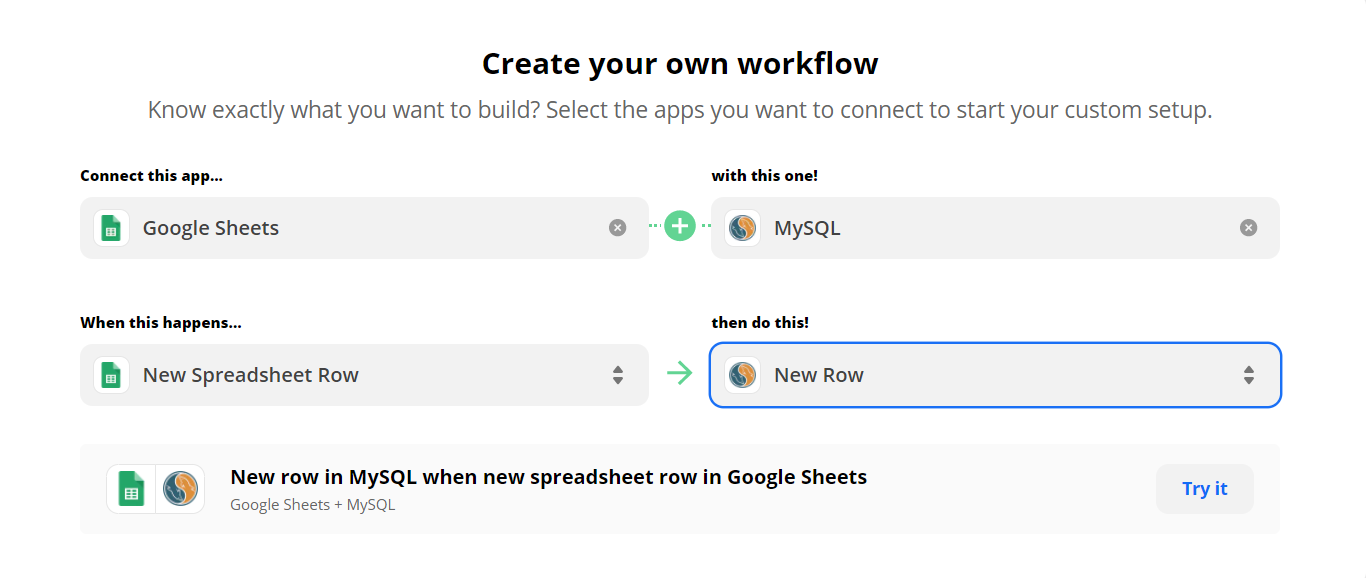
Click on "Try it" and this will take you to the integration page.
Step 2 - Setup trigger and action
You will see “Trigger” and “Action” events on the dashboard. We will be configuring the trigger as “New row in Google Sheets” and the action as “Inserting the new row in MySQL table”
Sign in to Google Sheets account and press "Continue"
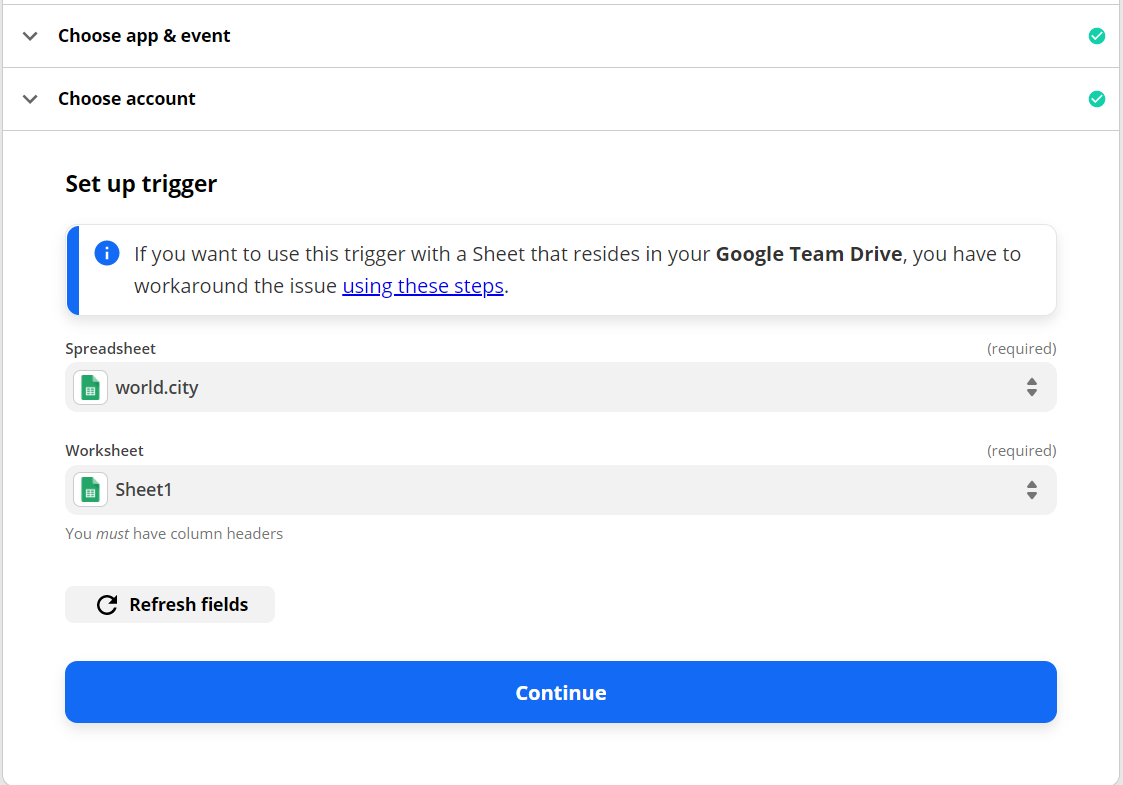
Choose the spreadsheet and worksheet that you have created with the table’s column names and press "Continue"
Step 3 - Test trigger
Test the trigger to find the spreadsheet row and column information like below:
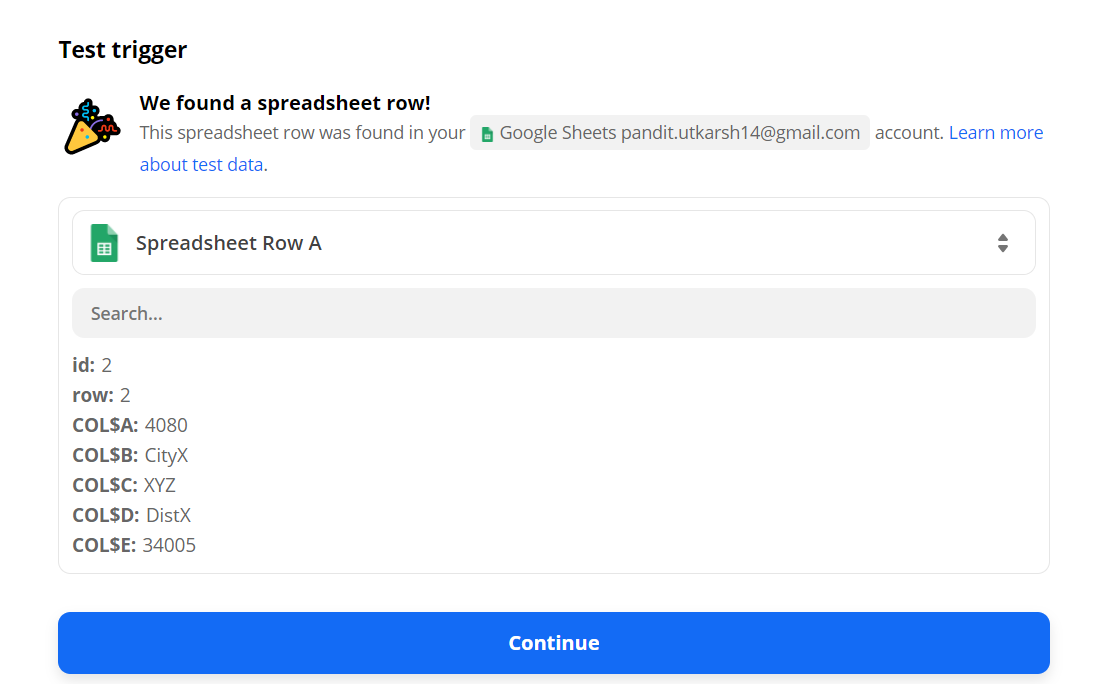
Our spreadsheet has been read and analyzed successfully. Press "Continue" to move forward.
Step 4 - Add new action
Now before we move forward and configure the “New Row in MySQL” action we will be configuring one more action which is the “Find Row in MySQL” action. This middle action is important because we only want to add rows that do not already exist.
Add the middle action like below:
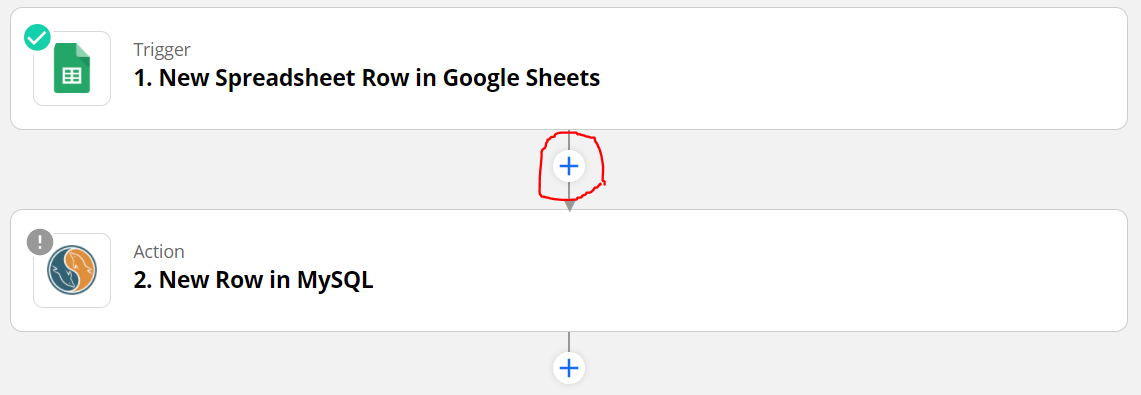
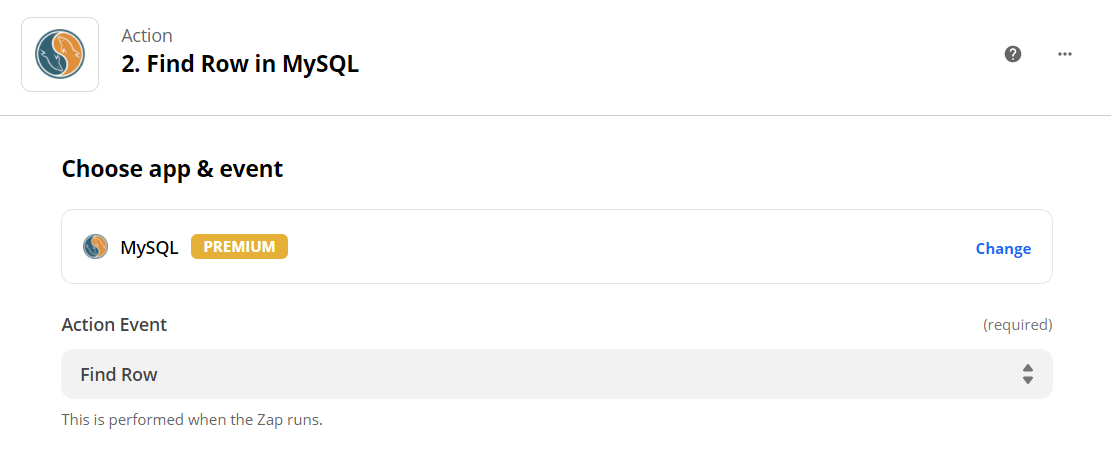
Choose App Event as “MySQL” and Action Event as “Find Row”. Then "Continue":
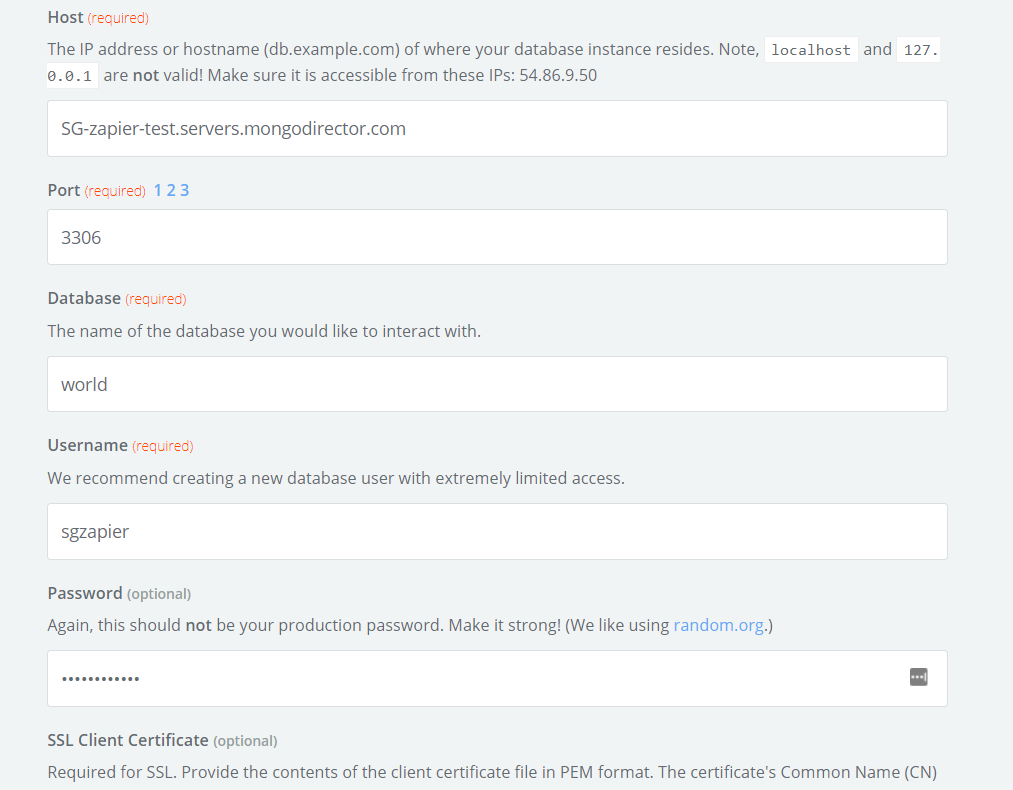
At this step, you need to sign in to the ScaleGrid MySQL account. Get the following MySQL deployment information:
a. Username for your database user (The user you created earlier in the prerequisites)
b. Password for your database user (The password of the user you created earlier in the prerequisites)
c. Hostname
d. Port (default 3306)
SSL CertificatesScaleGrid deployments use a self-signed certificate, so you’ll likely receive an SSL Certificate Failure error. Zapier currently only supports SSL certificates which are issued by public certificate authorities. So because of this constraint, for now, you can only integrate non-SSL ScaleGrid deployments with Zapier.
Skip the SSL Certificate fields, since it’s optional, and press "Continue".
Step 5 - "Find Row" action setup
Set up the “find row” action with required fields:
- Table: Choose the table to integrate with workflow and where the find operation will happen.
- Lookup Column: Column to search into
- Lookup Value: Row value in spreadsheet which will be searched in the table
- Should This Step Be Considered A "success" When Nothing Is Found?: Set it to True, because we want to consider a “not found” result from this search as success and filter to run the next “Add Row” action.
Press "Continue" and then test the action. On success you'll see this:
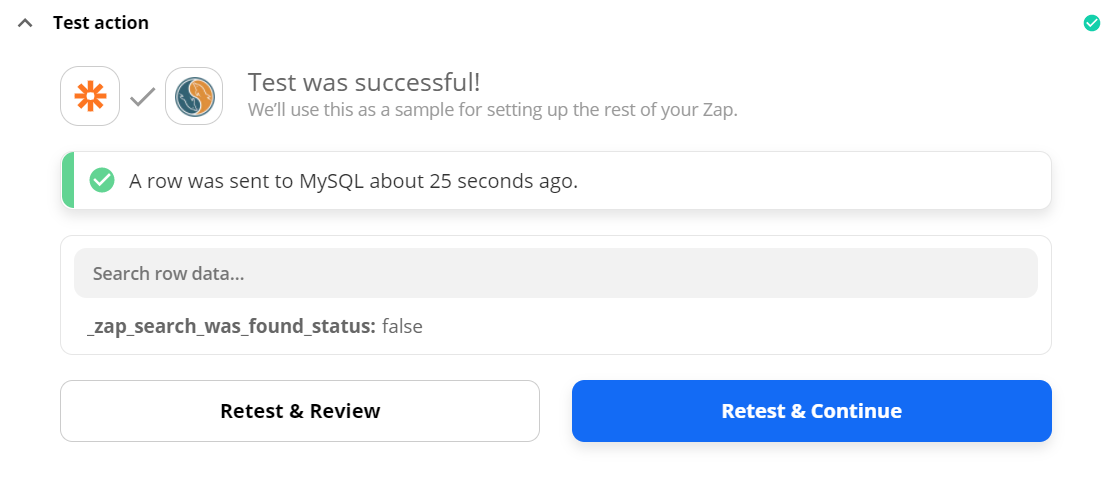
Step 7 - Configure "Add Row" action
Now we will configure the “Add Row” action.
Choose the MySQL account and press "Continue"
Set up the “Add Row” action with required fields:
- Table: Table in MySQL to add a row to.
- <Columns found in table>: Map all the column fields with the respective columns in the spreadsheet.
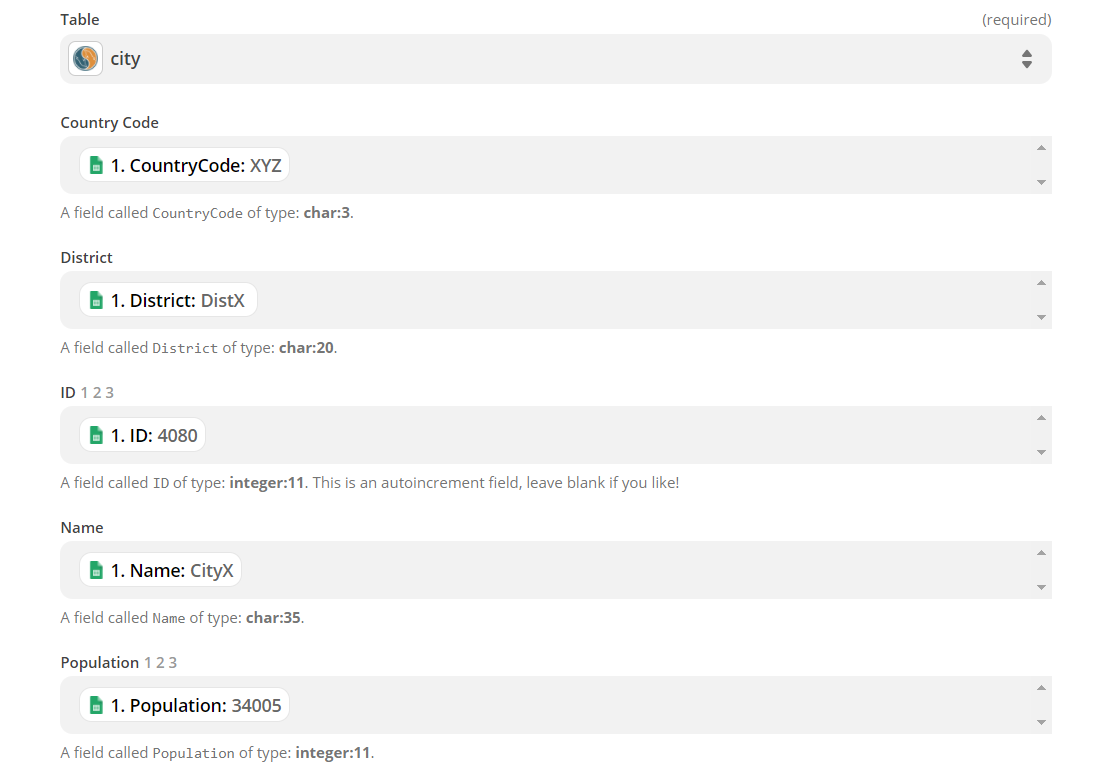
Press "Continue", then test the action to add the Google Sheet row to MySQL. A successful test looks something like this:
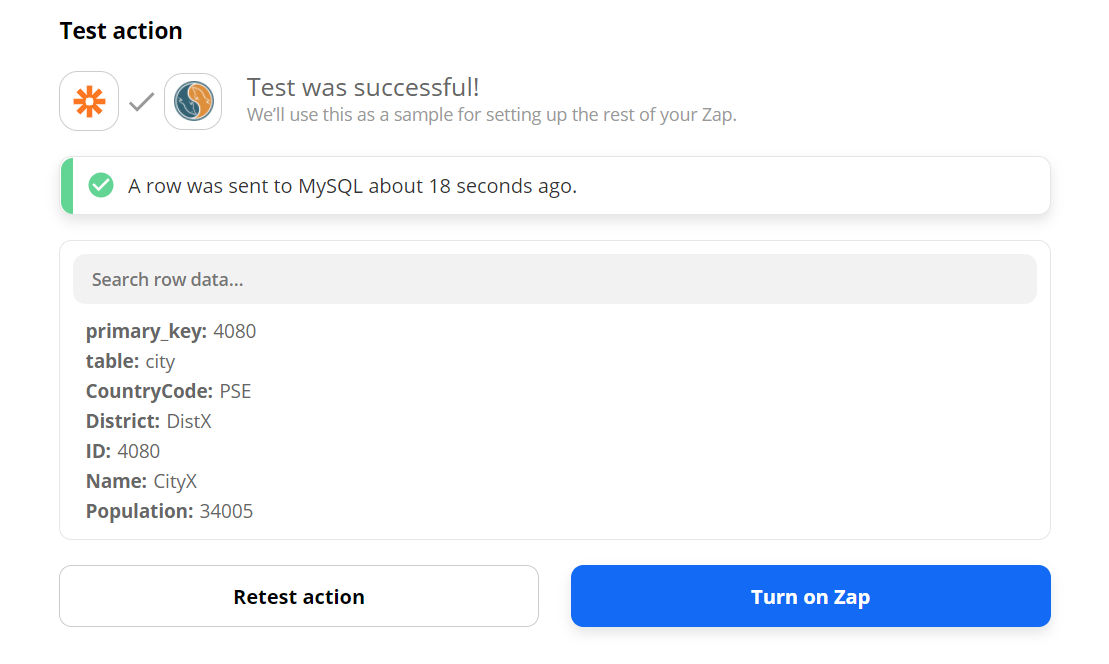
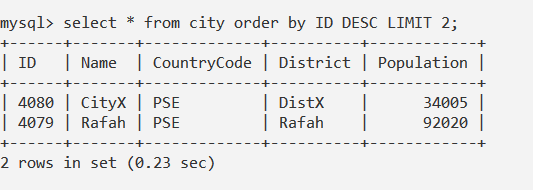
To confirm the workflow test, check the table entry and you’ll find a new row added like the one below:
Finally, turn on the zap and exit.
Congratulations, you have successfully integrated your ScaleGrid MySQL deployment with Google Sheets using Zapier, to automatically insert new rows to your MySQL database whenever a new row is added to the Google Sheet.
Updated 9 months ago
