
Live Migration for MySQL
Easily migrate your MySQL deployments to ScaleGrid with minimal downtime using our live migration tool.
Easily migrate your MySQL deployment to ScaleGrid with minimal downtime using our Live Migration tool. MySQL database migration is a complex and time consuming activity and Live Migration tool simplifies the whole process into few orchestrated steps.
Important: Upon completing the Live Migration process, a new cluster will be created with an identical dataset to the original (source) cluster. After the synchronization process, you can utilize this new cluster as your new production environment.
Prerequisites
Here are the things you'll need to set up live migration of your MySQL deployment to ScaleGrid:
- ScaleGrid MySQL deployment - Create under our Dedicated or BYOC plans.
- Remote server name
- Port
- SSL configuration
- Remote server username and password
Here are the things you need to ensure before you set up live migration of your MySQL deployment to ScaleGrid:
- The remote MySQL deployment must have a minimum of 5 days of binary log retention
- The network communication must be properly configured between the remote and ScaleGrid MySQL deployment.
- Ensure that the ScaleGrid server IP addresses are whitelisted on your remote MySQL server. If your ScaleGrid deployment is a replica setup, then make sure you whitelist the IPs of Master and all the Slaves.
- If the deployments are within VPC, ensure that security groups are properly configured to allow communication between ScaleGrid and remote MySQL servers.
- The user on the remote MySQL server must have the following minimal privileges
- GLOBAL SELECT
- SHOW VIEW
- EVENT - in order to import events
- TRIGGER - In order to import triggers.
- SUPER - In order to get binary log coordinates for mysqldump snapshot
- REPLICATION SLAVE
Special consideration for AWS RDS deployments - RDS users do not get SUPER privileges. Our tool can still handle the live migration without the SUPER privilege as explained in the Live sync from RDS MySQL deployment section.
Live Migration into a ScaleGrid MySQL Deployment
Before starting your live migration into your newly created MySQL deployment at ScaleGrid, verify that there is no data in this deployment so that any existing data isn't overwritten. If you'd like to override your existing data in the import, first create a backup to ensure your existing data is preserved.
Live migration will happen in 3 high level steps:
- Exporting a baseline dump taken from your remote MySQL deployment
- Binary log based replication from your remote MySQL server to ScaleGrid deployment
- Switch over your applications from the remote MySQL server to ScaleGrid MySQL deployment
Live Migration Setup
- Log into your ScaleGrid account, or start a free 7-day trial.
- Go to your MySQL dashboard, and select the cluster you'd like to migrate to.
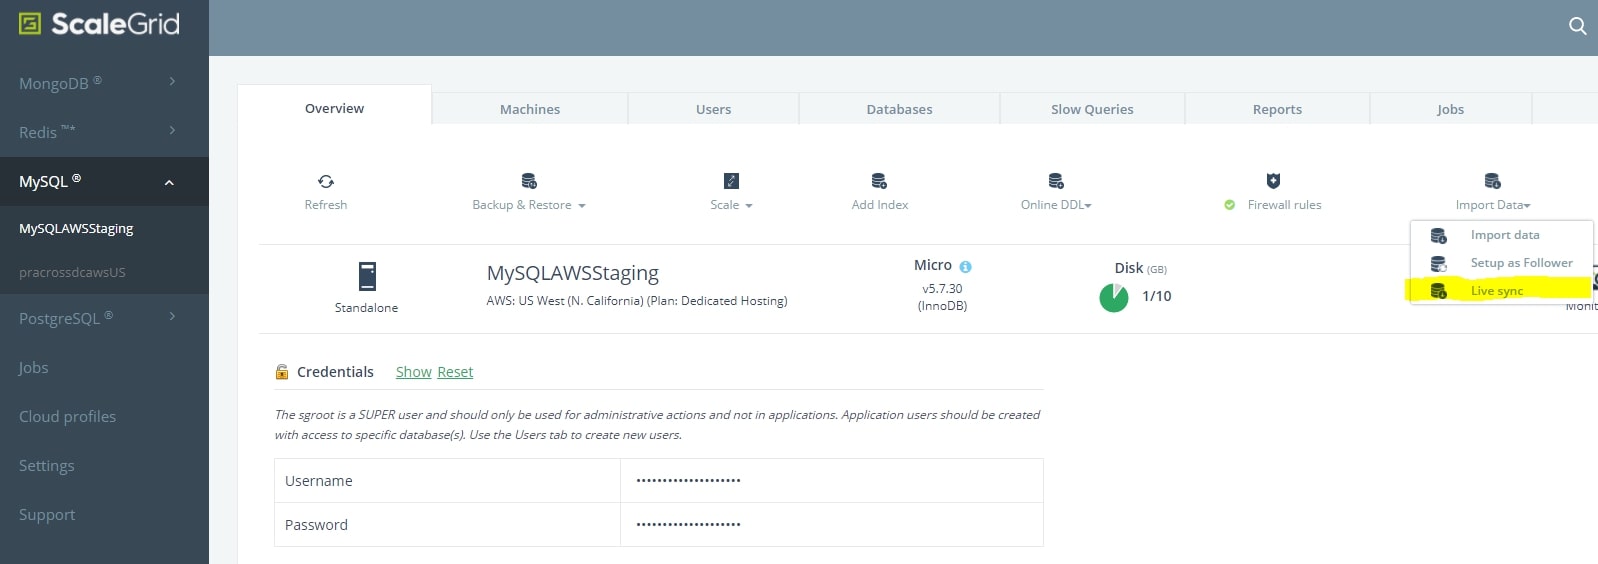
- Under the Overview tab, click Import Data -> Live sync:
Step 1
The following Live sync wizard will open as below. Enter the inputs as per the directions below.

- ‘Server name to take baseline dump’ : If your remote MySQL deployment has source-replica setup, you have an option to take the baseline dump either from the source node or the replica node. You can enter the FQDN for the source server name or replica server name as the input here.
- ‘Server name to user for binlog replication’ : This input always needs to be the MySQL source server(Master) of your remote deployment.
- Next, enter the username and password for your remote server.
- Check the 'Yes' box if the remote server has SSL enabled.
Live sync from RDS MySQL deployment
To Live sync from your RDS deployment, you need to complete the following steps to prepare your RDS deployment for Live sync.
- Create an Amazon RDS read replica from the source MySQL DB instance. For more information, see Creating a read replica. The baseline dump for your live sync has to be taken from the read replica.
- On the Amazon RDS read replica, call the mysql.rds_stop_replication stored procedure to stop the replication process. You should not start the replication till Live sync to ScaleGrid MySQL is completed.
- Stopping the replication on Amazon RDS read replica will also ensure that the source MySQL DB instance no longer purges its binary log files, and they can be used for binary log based replication during live sync.
In the MySQL Live sync wizard, enter the following inputs.
- Server name to take baseline dump’ : Enter the end point name for your AWS RDS read replica
- Server name to user for binlog replication’ : Enter the end point name for your AWS RDS source server
- Next, enter the username and password for your remote server.
- Check the 'Yes' box if the remote server has SSL enabled.
Step 2
In the next wizard, you will be shown a list of databases that you would like to live sync. Check the databases accordingly and click Next. The Live sync tool will run a number of validations in the background to ensure all the prerequisites for the live sync are in place.

Step 3
In the next wizard, you have an option to import the users of your remote MySQL server to ScaleGrid server. If your source server is RDS MySQL, the system users like ‘rdsadmin’ will automatically be ignored. Click the Import Users button.

Step 4
After importing users, you can start the live sync by clicking the Start live sync button.

Your MySQL live sync has now begun!
Live Migration Workflow
Initial import
- Baseline dump is taken on your remote MySQL server using mysqldump utility.
- The dump is restored on the destination

Replication from the remote server
- ScaleGrid deployment is set up as a replica of the remote MySQL server
- This will enable all changes happened in the source after the baseline dump to be replicated to ScaleGrid deployment
- Replication status will be continuously monitored while the ScaleGrid deployment catches up with the remote MySQL
- If the ScaleGrid deployment is a source-replica set, replication status of the ScaleGrid replicas will also be monitored and replication lag information is continuously updated.

Prepare to complete live sync
This is the final step of the live migration and your deployment is ready for switchover. At this point, you can get ready to complete the migration and point your application to the ScaleGrid MySQL deployment.
Here are the steps to be followed:
- Stop all writes to the source cluster. Wait for at least 30-60 seconds for all the writes to get replicated.
- Ensure the replication lag of all servers is 0. This indicates that ScaleGrid deployment is in sync with the remote MySQL server.
- Change the connection string in your application to point to the ScaleGrid deployment. The credentials and connection string are available under the Overview tab in the cluster details page.
- Do not start writes yet.
- Click the Complete live sync button to complete the live migration process.

Confirm Your Successful MySQL migration
At this point, the ScaleGrid deployment will stop the live sync, run the necessary health checks and become available for writes. You are ready to start your application to connect and write to your ScaleGrid MySQL deployment
