Setup an AWS VPC Infrastructure for your Database Servers
This document outlines the steps to create your AWS Virtual Private Cloud (VPC) infrastructure with:
- One public subnet, and
- Three private subnets (one in each availability zone (AZ)).
The goal is to have three private subnets in which the database servers can be deployed. When database servers are deployed in private subnets they cannot be accessed from the internet.
Step 1: Elastic IP
Allocate a new Elastic IP to be used for the NAT gateway under the VPC Dashboard of your AWS account. The NAT gateway allows machines in your private subnet to be able to reach out to the internet.
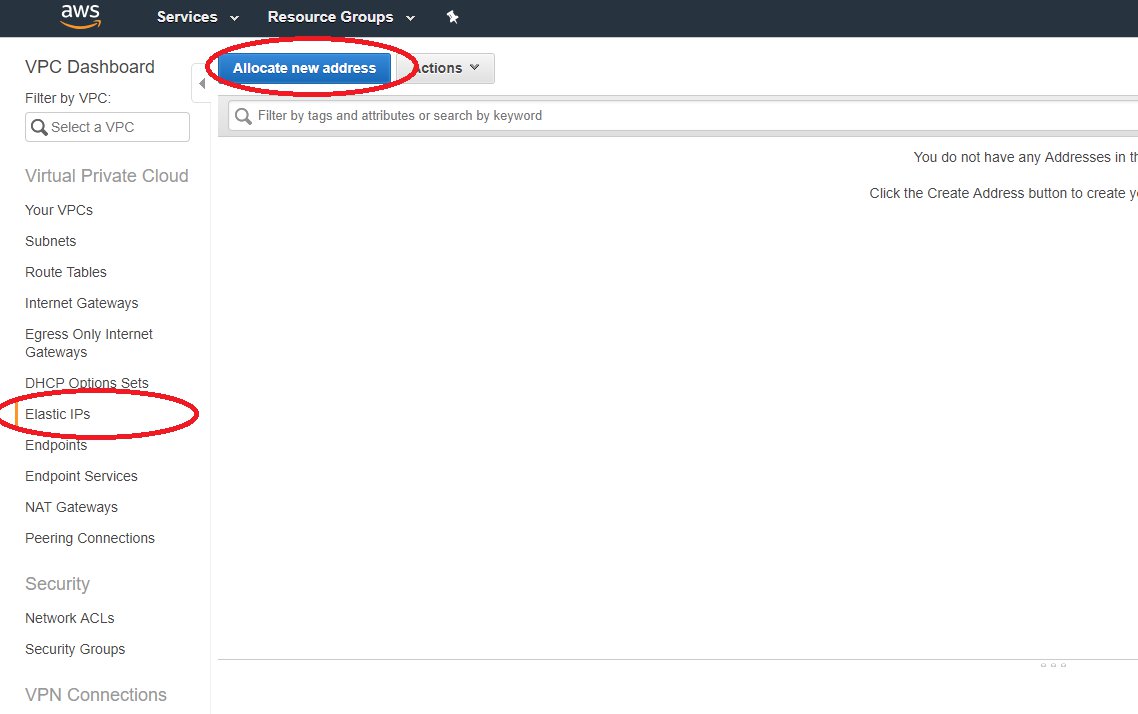
Step 1: Allocate new Elastic IP Address
If prompted for type, use VPC as the deployment target.
Note down the Allocation ID of the newly created Elastic IP:
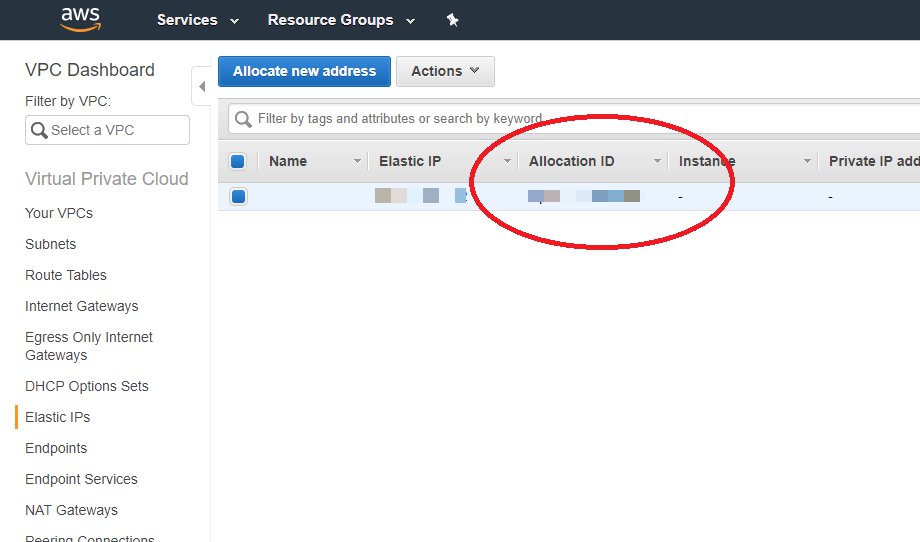
Allocation ID
Step 2: Start VPC Wizard
Navigate to your VPC console on AWS and click Start VPC wizard:
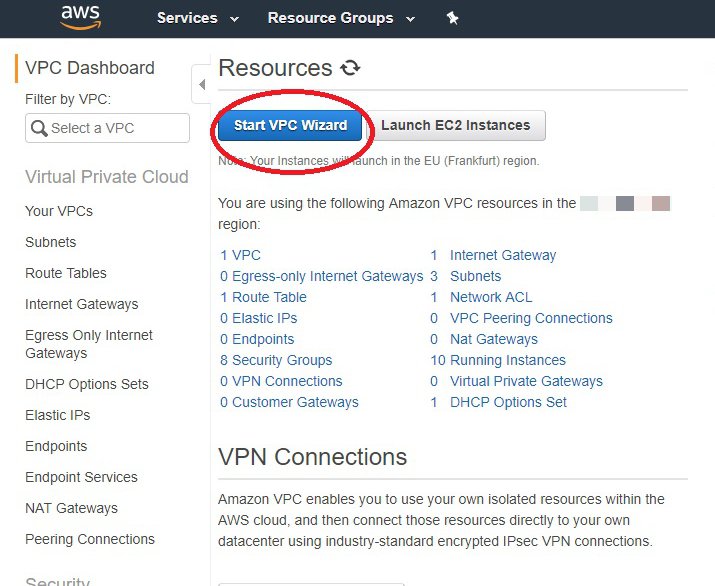
VPC Wizard
Step 3: Add Subnets
Customize the address space that you want to allocate to each subnet if needed. This wizard only creates one private subnet. Once the VPC is created, we will add the two other subnets.
Input the Elastic IP Allocation ID that you noted down earlier for the NAT gateway:
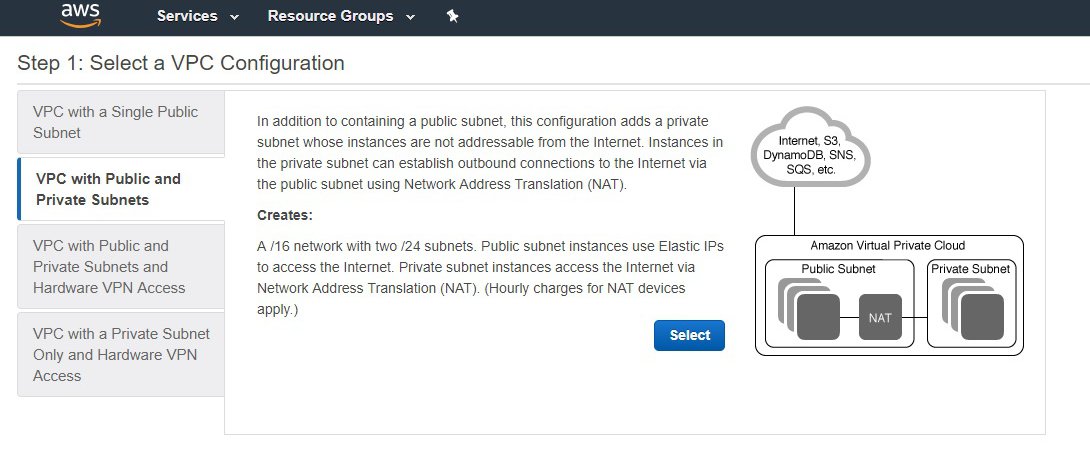
Step 3: Add Subnets
Public subnet 1: 10.0.0.0/24
Private subnet 1: 10.0.1.0/24
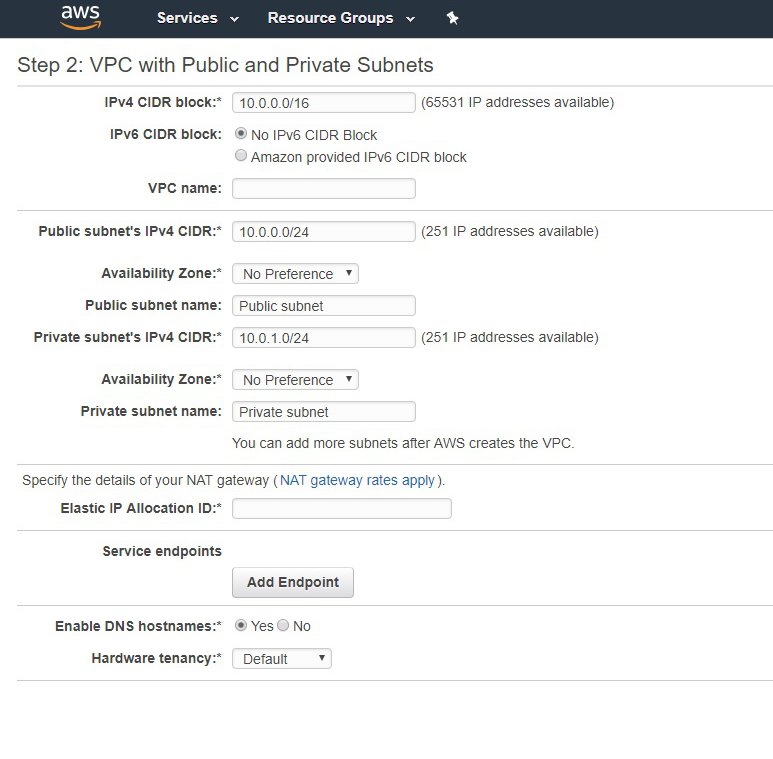
Subnet Examples
Step 4: Select Private Subnet
Once you've created the VPC, click on Subnets on the left menu to display all of your subnets. Select your private subnet and note down the AZ and Route Table ID:
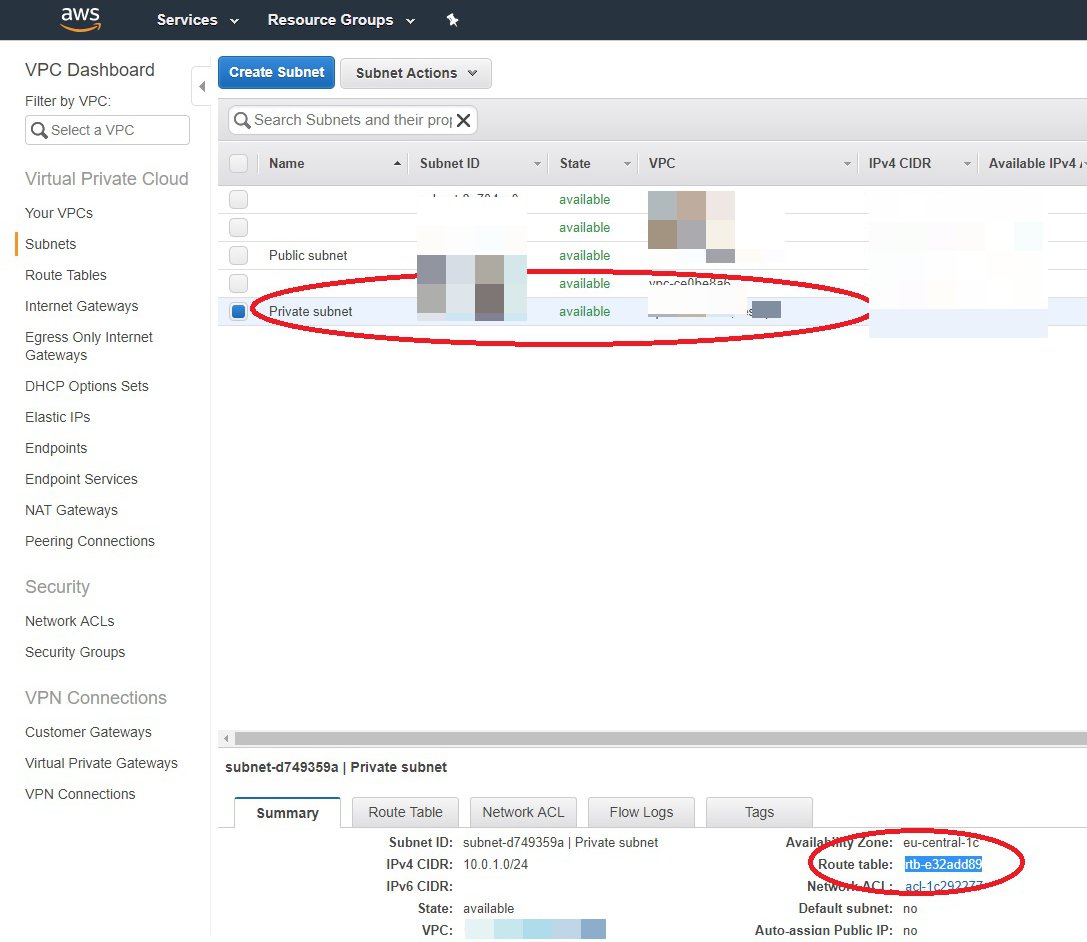
Step 4: Select Private Subnet
Step 5: Add Private Subnet
Click Create subnet to add one more private subnet. Update the CIDR that you want to use, and select the right AZ to ensure that each subnet is in a different AZ. Repeat the process twice to add two subnets:
Private subnet 2: 10.0.2.0/24Private subnet 3: 10.0.3.0/24
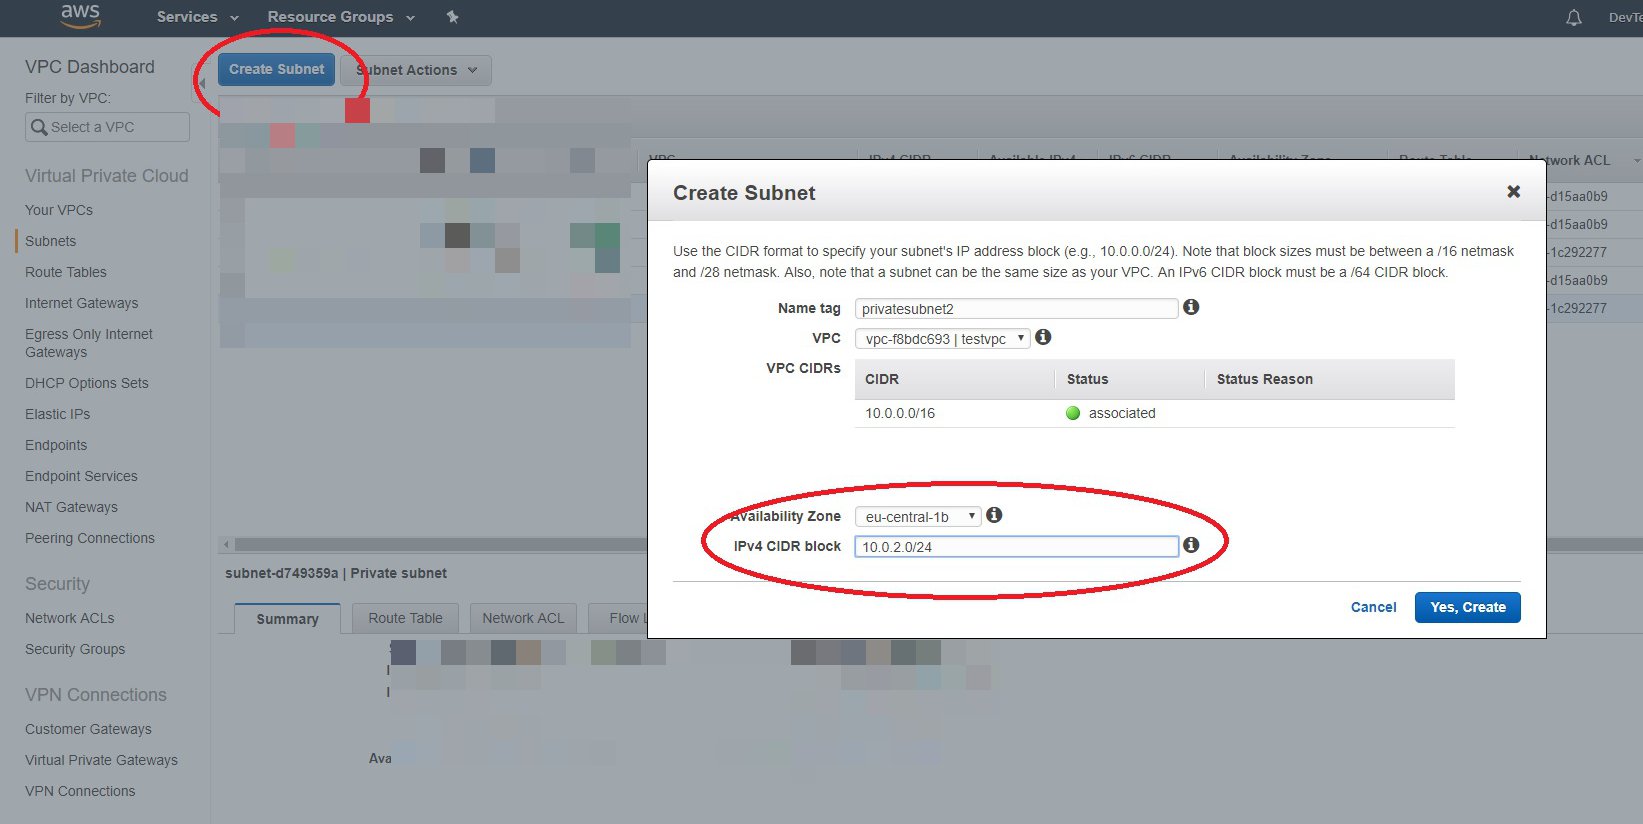
Step 5: Add more subnets
Step 6: Validate Route Table
For each newly created subnet, validate the Route Table to ensure that you're using the same Route Table as the first private subnet:
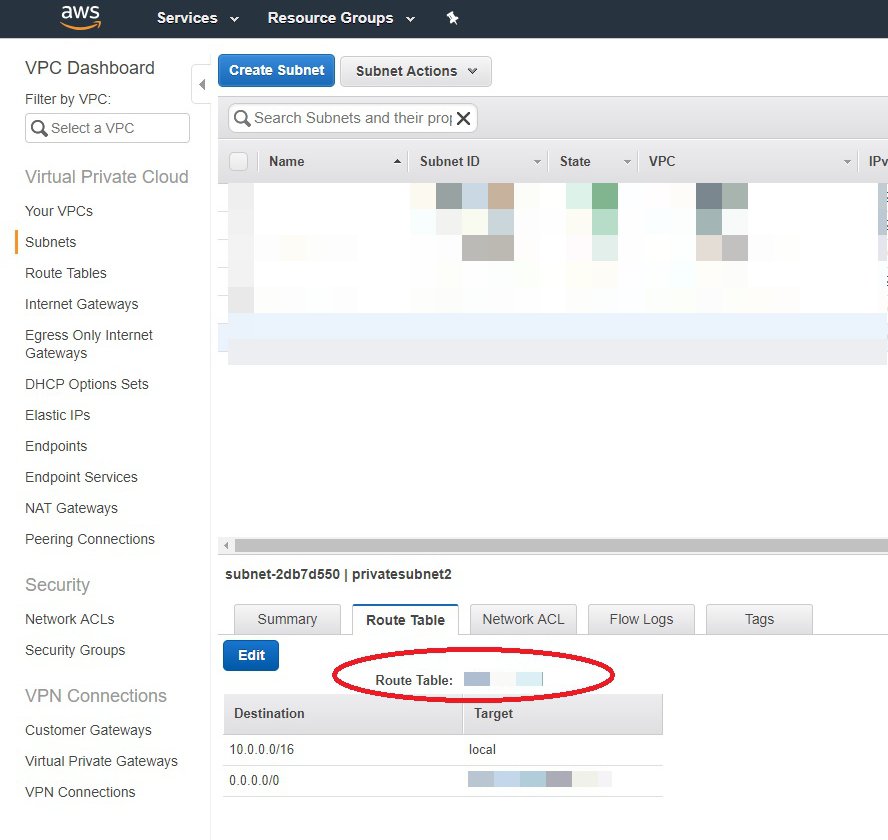
Step 6: Validate Route Table
Step 7: Create Security Group
Create a new VPC Security Group to use with your database servers:
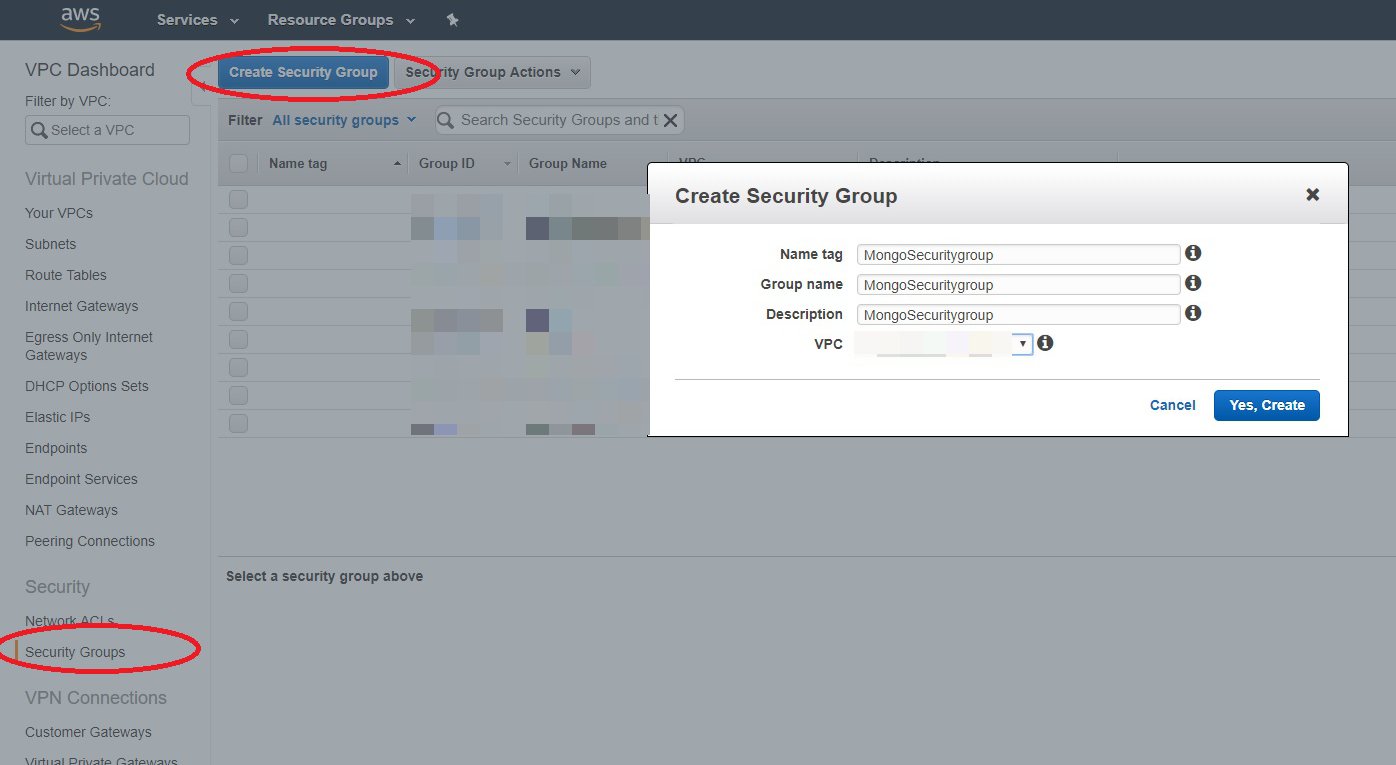
Step 7: Create a Security Group
Note down the ID of the Security Group you just created. Then, you can open TCP 27017 on this Security Group to the Security Group(s) of your application servers.
At this point, your VPC infrastructure is set. You have three private subnets in three different AZ’s.
Public subnet 1: 10.0.0.0/24Private subnet 1 is: 10.0.1.0/24.
Private subnet 2: 10.0.2.0/24
Private subnet 3: 10.0.3.0/24
Security Group:
<SGID>
Updated 8 months ago
Create three 3 cloud profiles, one of each of these three private subnets. Learn more on how to create EC2 Cloud Profiles here:
