Import ScaleGrid SSL certificate in Microsoft Windows
This article provides step-by-step instructions for importing ScaleGird SSL certificates in Microsoft Windows.
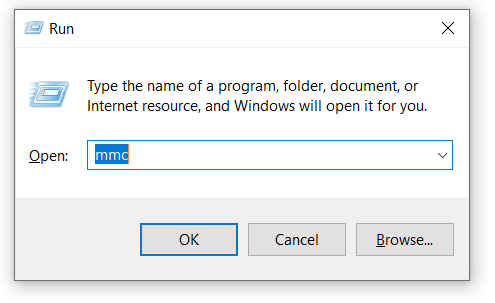
Step 1 - Open MMC
Open Microsoft Management Console (Start > Run > MMC).

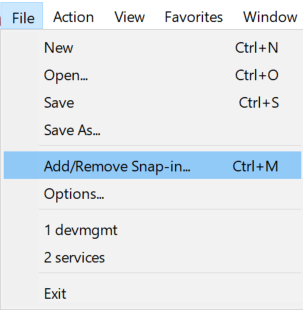
Step 2 - Add/Remove Snap-in...
Go to File > Add / Remove Snap-in...

Step 3 - Certificates
Double-click Certificates > Select Computer Account > Select Local Computer > Finish
Click OK to exit the Snap-in window.
Step 4 - Navigate to Certificates
Click the [**>**] next to Certificates > Trusted Root Certification Authorities > Certificates
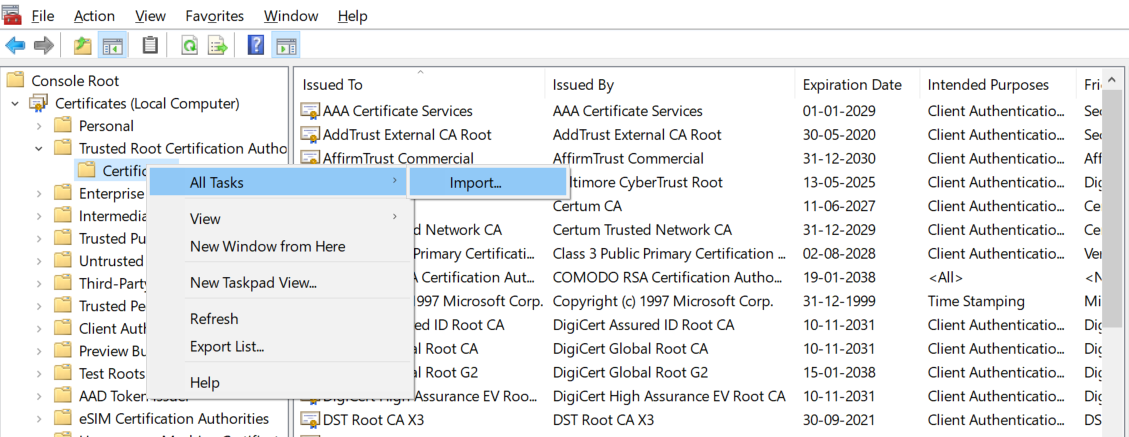
Step 5 - Import
Right click on Certificates and select All Tasks > Import.

Step 6 - Locate .pem
Click Next > Click Browse > Choose All Files (.) > Select the .pem you would like to import > Click Open > Click Next.
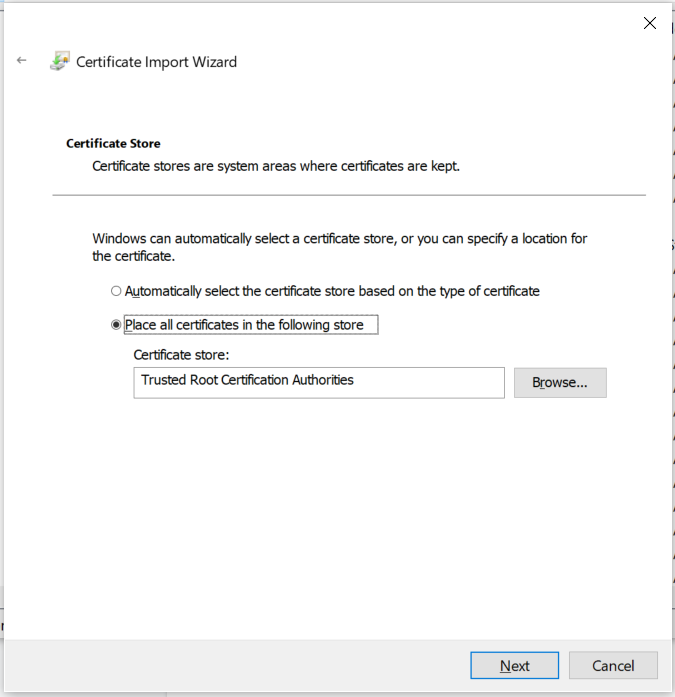
Step 7 - Certificate import wizard
Select Certificate Store: Trusted Root Certification Authorities

Step 8 - Finish
Click Finish & OK
The certificate is now visible in IIS.
Updated 9 months ago
