SSO - Idaptive SAML Configuration
{/* Start of HubSpot Embed Code */}
{/* End of HubSpot Embed Code */}
Follow these simple steps to set up Idaptive SAML for your ScaleGrid DBaaS account.
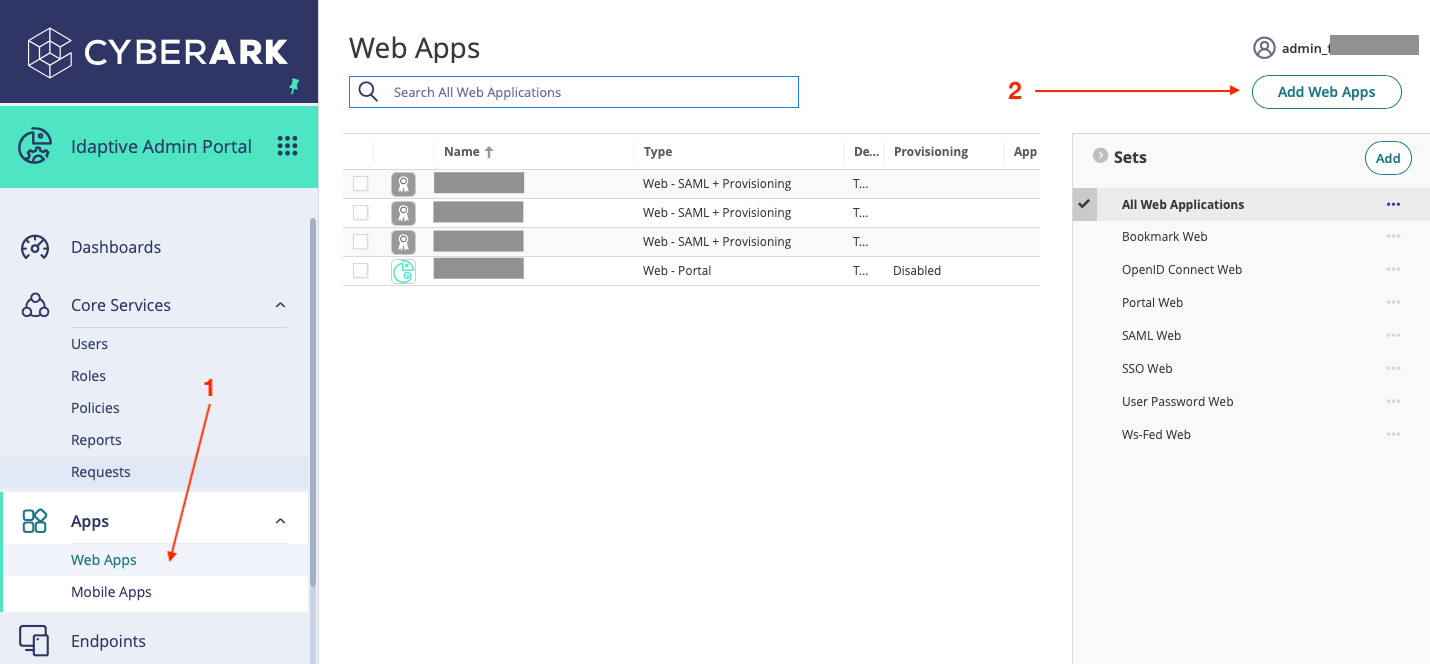
- Login to Idaptive.
- Click "Web Apps" from the left menu.
- Click "Add Web Apps".
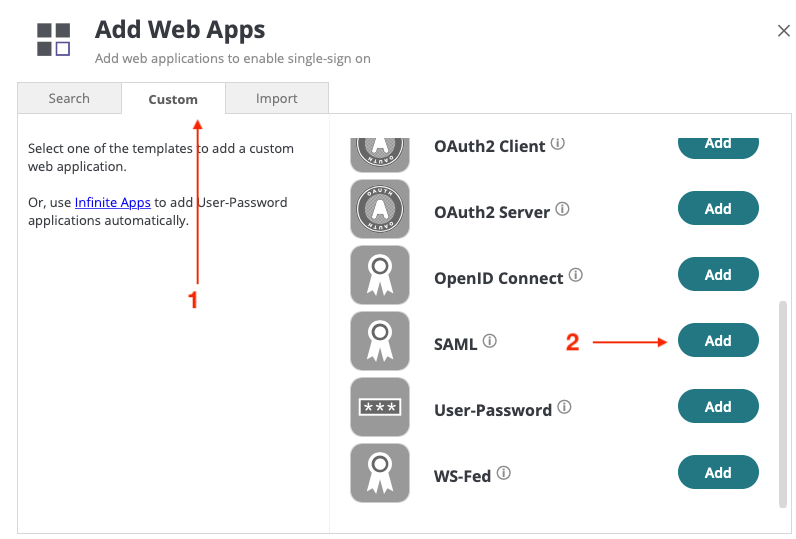
- Select the "Custom" tab.
- Click the "Add" button under "SAML”.
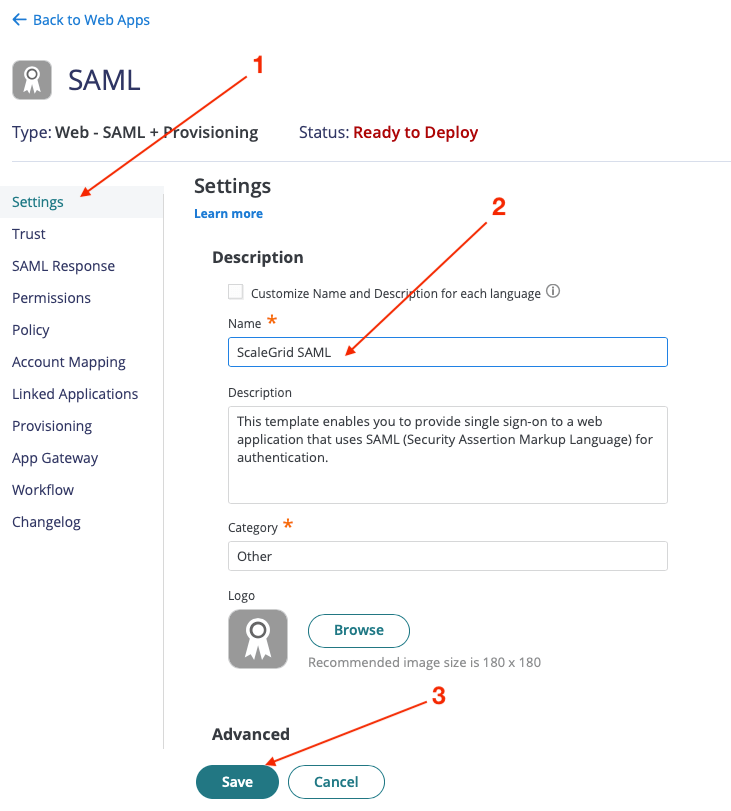
- Click "Settings" from the left menu
- Enter a name, and click "Save".
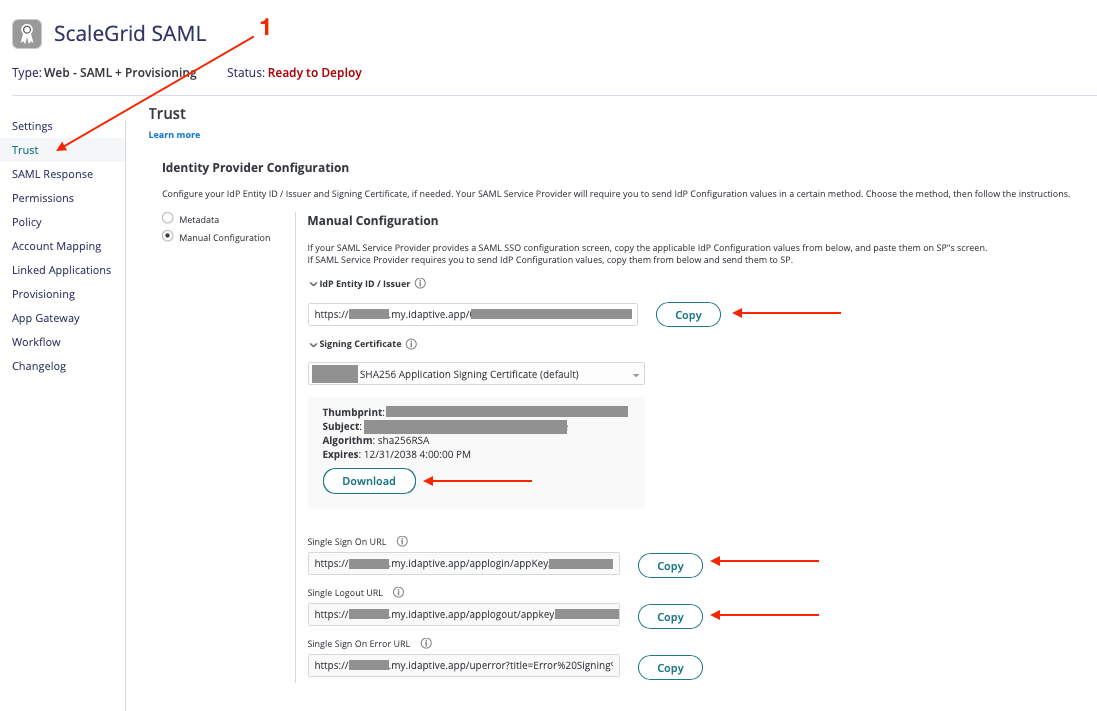
- Click "Trust" from the left menu.
- Under "Identity Provider Configuration":
- Select "Manual Configuration"
- Copy "IdP Entity ID / Issuer" value. Eg. https://xxx.my.idaptive.net/523452345dae97454dec
- Download "Signing Certificate"
- Copy "Single Sign On URL" value. Eg. https://xxx.my.idaptive.net/applogin/appKey/2345234/customerId/XXX
- Copy "Single Logout URL" value. Eg. https://xxx.my.idaptive.net/applogout/appkey/2234223ec/customerid/XXX
- Under "Identity Provider Configuration":
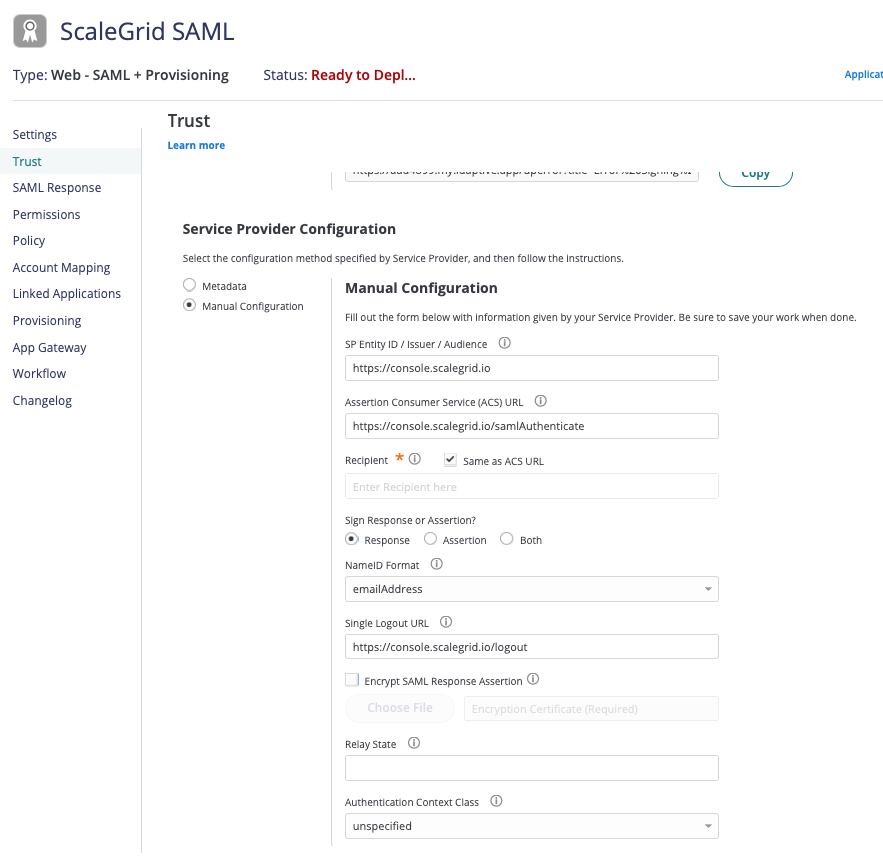
- Under "Service Provider Configuration":
- Select "Manual Configuration"
- SP Entity ID / Issuer / Audience: https://console.scalegrid.io
- Assertion Consumer Service (ACS) URL: https://console.scalegrid.io/samlAuthenticate
- Recipient: Same as ACS URL
- Sign Response or Assertion: Response
- NameID Format: emailAddress
- Single Logout URL: https://console.scalegrid.io/logout
- Encrypt SAML Response Assertion: No
- Relay State: <ignore this field>
- Authentication Context Class: unspecific
- Click "Save" after you complete the above.
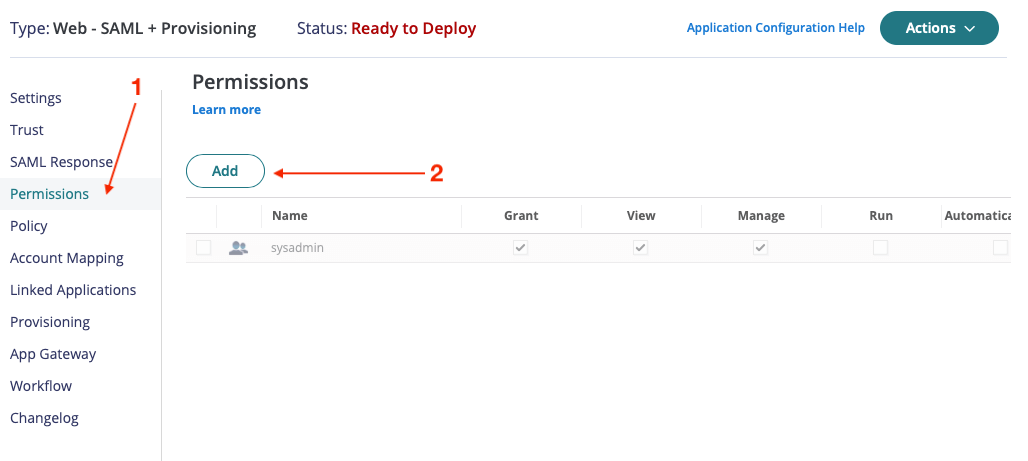
- Then, click "Permission" from the left menu.
- Click the "Add" button.
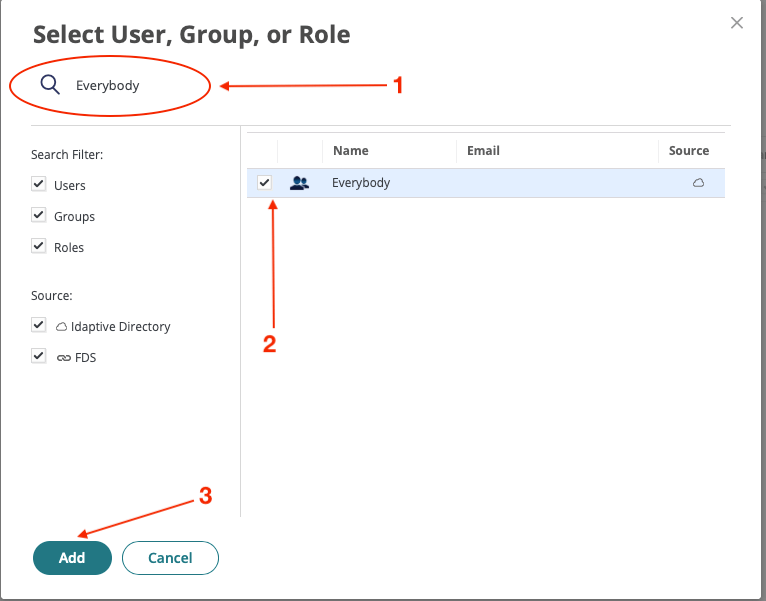
- Enter "Everybody" (or any user, group and role) in the search box.
- Select users, groups and/or roles then click "Add" button.
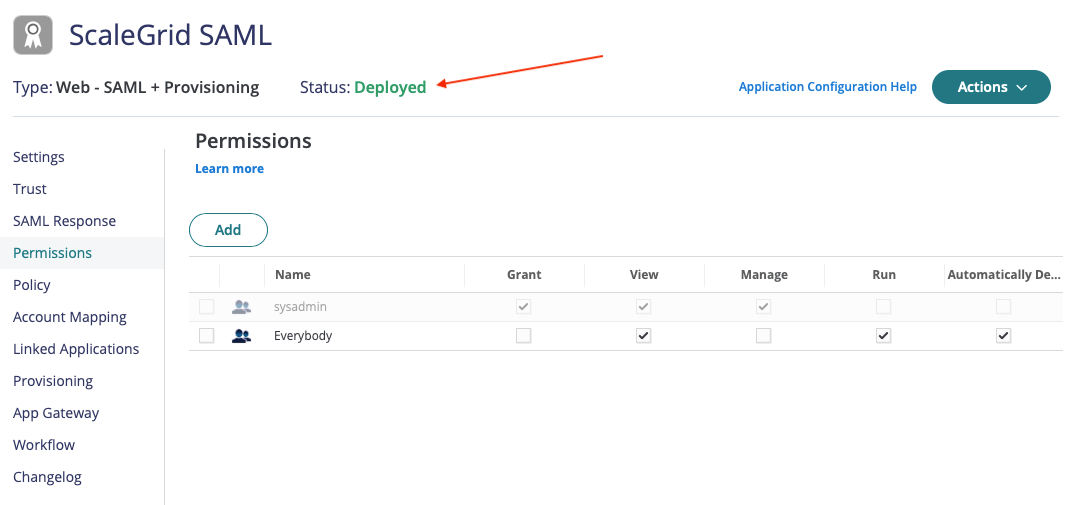
- Click the "Save" button. You should see the status "Deployed".
When you're done, send [email protected] the following information:
- IdP Entity ID / Issuer
- Signing Certificate file
- Single Sign On URL
- Single Logout URL
Once you're through these steps, head back to our SSO - SAML Setup page to finalize your secure login setup.
Updated 8 months ago
