Zapier - Creating new Google Sheets rows from MySQL rows
To integrate Zapier with ScaleGrid MySQL deployment, let's create a zap (aka Zapier workflow) where you connect your Scalegrid MySQL with Google Sheets. You can save your new/updated MySQL rows as Google Sheets rows without the hassle of manual setup. After you set up this MySQL Google Sheets integration, every time a new row is added to Google Sheets, a new row will be inserted automatically into the table. This is a great option for presenting database data to non-technical users.
How it works
- A MySQL row is inserted
- Zapier adds a new Google Sheets row
What you need
- A ScaleGrid account
- A MySQL database to connect with
- A MySQL user with read-write access to the database
- A Google account
Prerequisites
- Create a MySQL deployment at ScaleGrid.
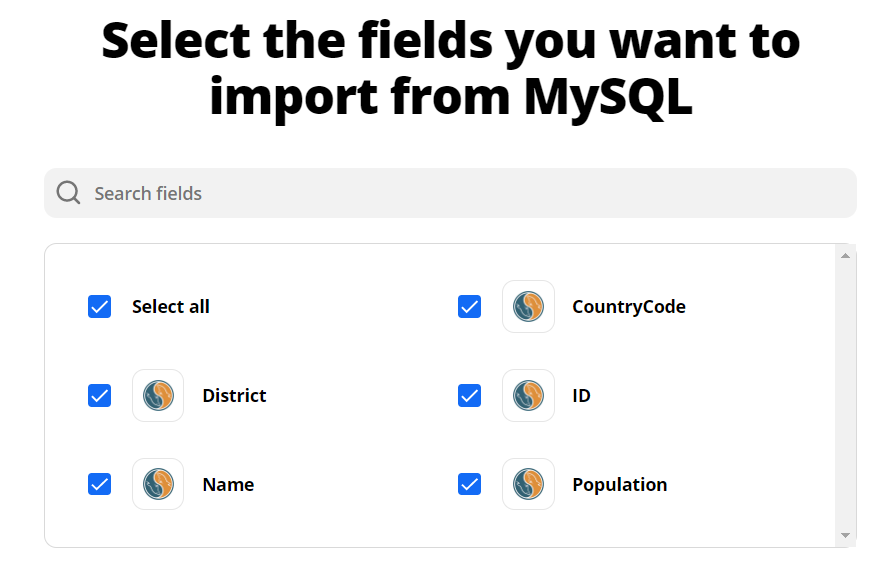
- A database to connect with. For demonstration purposes, I'm using a sample database, "world" with the table "city", which has the following fields/columns in it:

- Create a MySQL database user with read-write access to the required database. For demonstration, I have created a user “sgzapier”, that has read-write access to the “world” database.
Configuration
Step 1 - Zapier setup
Go to MySQL+Google Sheets integration page on Zapier. Click on "Try it" and then "Get Started".
You’ll land on a page where you’ll be asked to connect your ScaleGrid MySQL account. Get the following MySQL deployment information from your cluster details page:
- Hostname
- Port (default 3306)
Use the database user credentials that you created earlier.
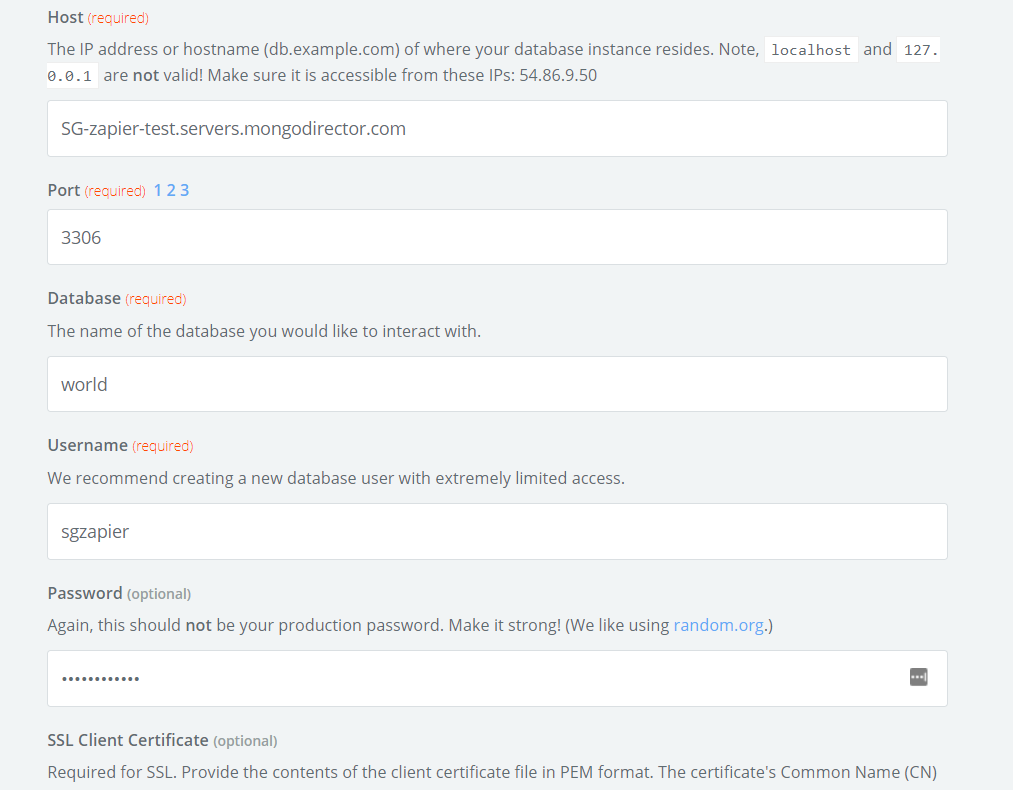
SSL CertificatesScaleGrid deployments use a self-signed certificate, so you’ll likely receive an SSL Certificate Failure error. Zapier currently only supports SSL certificates which are issued by public certificate authorities. So because of this constraint, for now, you can only integrate non-SSL ScaleGrid deployments with Zapier.
Skip the SSL certificate fields, since it’s optional, then click on "Next".
Step 2 - Select table
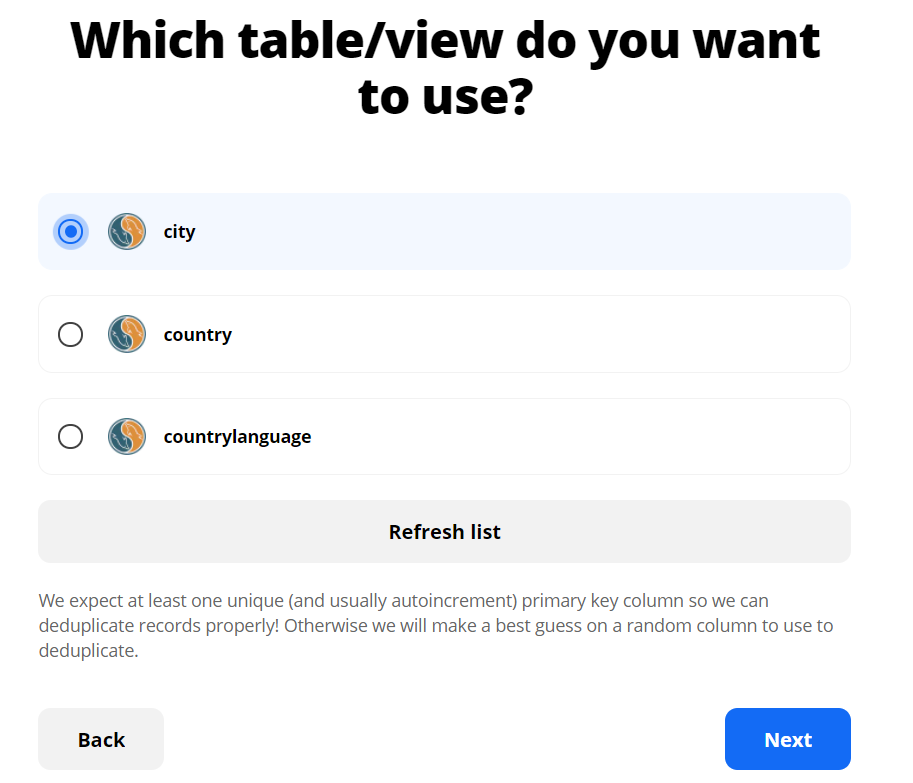
In the step below, select all the tables you want to use from the database. For demonstration purposes, I'll be using the "city" table. Once you've made your choice, click Next.
Step 3 - Select order
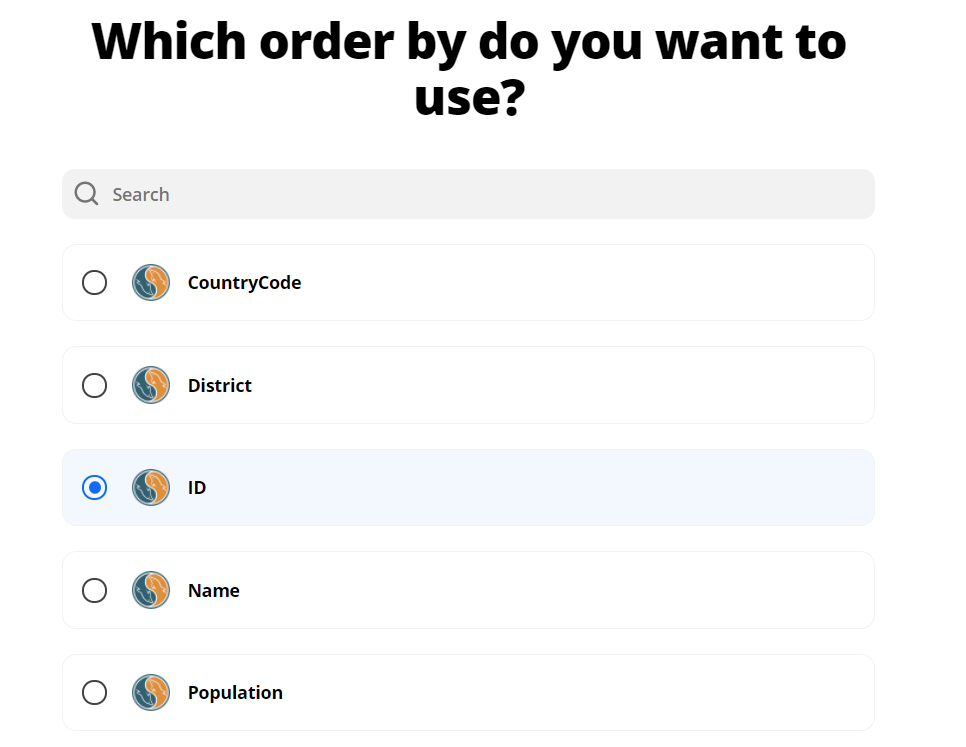
In this step, you’ll be asked to choose the order in which you want to sort the result-set. Usually, you want the results to be most recent first so we can skim off only new results, so choose something like "date_created" or your autoincrement id.
Step 4 - Dedupe key column
In the next step, you need to select the "dedupe key", which is the column with a unique key to deduplicate on. (In the example, it’s again the ID column).
Step 5 - Connect to Google
The next step is to connect your Google Account and your spreadsheet.
Click on "Connect" and choose the Google account you want to use. Give the asked permissions to Zapier to access your Google account. Click on "Next", then select "My Google Drive".
You will now be asked to choose a spreadsheet. Go with "Create new spreadsheet". Select all the fields/columns you want to export to Google Sheets from MySQL.
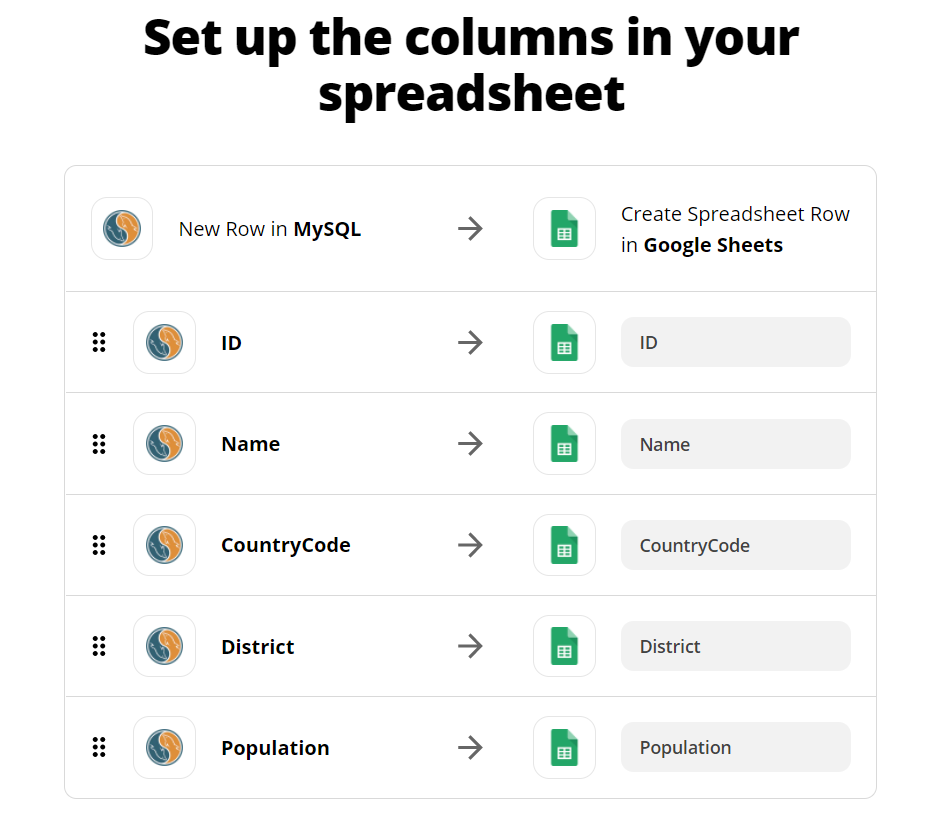
Step 6 - Column setup
Here you want to leave the fields as it is because we want the column name in the Google Sheets and MySQL database to be the same.
Step 7 - Test workflow
In the next step, test the workflow you created. Click on "Send test". What this test does is that it exports a row from your database table to the Google Sheets to confirm the workflow. As you can see in the example below, a new row has been automatically added to the spreadsheet.

Step 8 - Review and activate
In the next step, review the workflow and turn on the zap.
Congratulations, you have successfully integrated your ScaleGrid MySQL deployment with Google Sheets using Zapier to automatically add new rows to the spreadsheet whenever a new row is created in the database table.
Updated 9 months ago
