SSO - Azure AD SAML Configuration
Follow these simple steps to set up Azure AD SAML on Azure Portal for your ScaleGrid DBaaS account.
- Login to the Azure Portal.
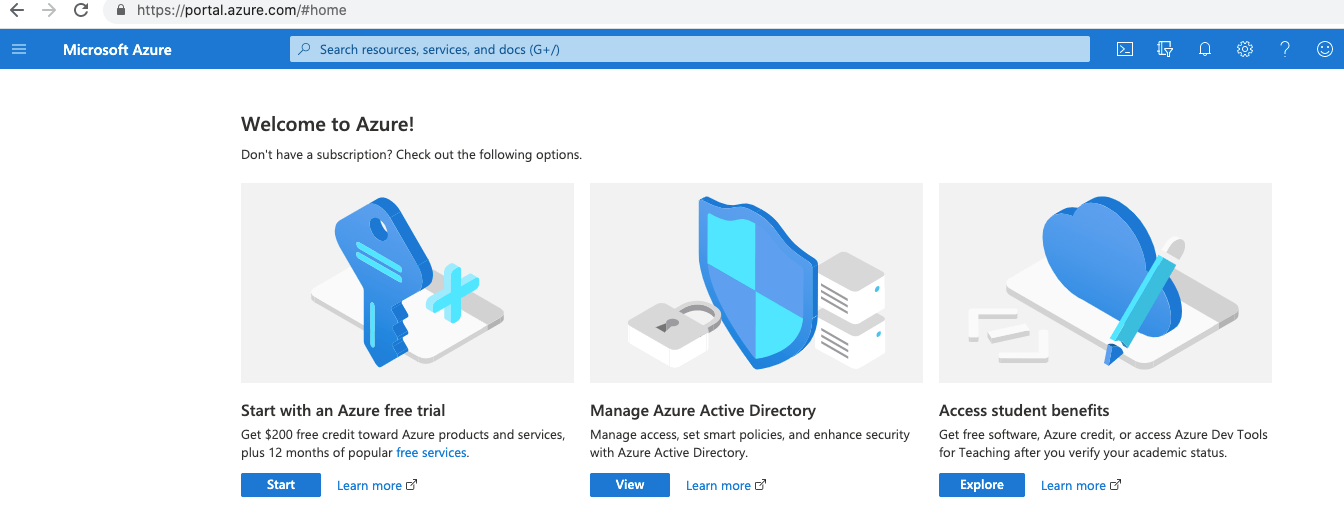
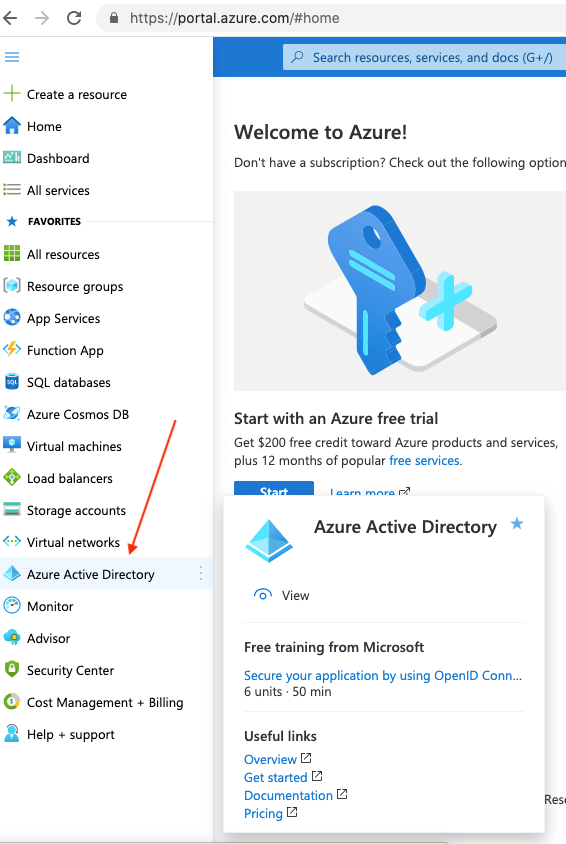
- Click "Azure Active Directory" from the left menu.
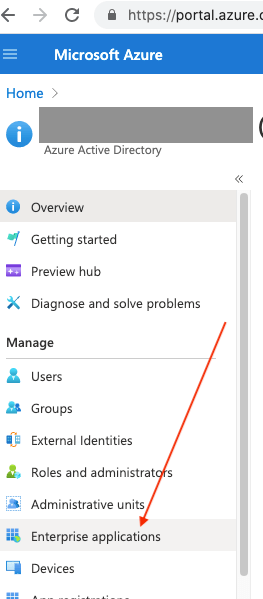
- Click "Enterprise applications" from the left menu.
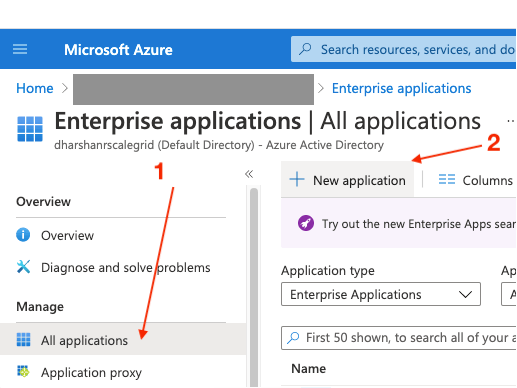
- Click "All applications" from the left menu under the "Manage" section.
- Then, click "New Application".
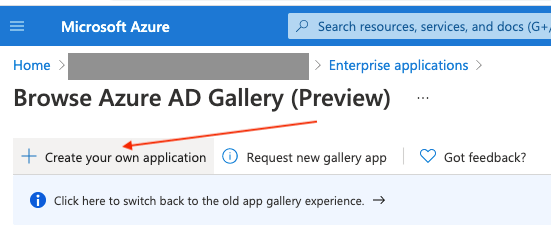
- Click "Create your own application".
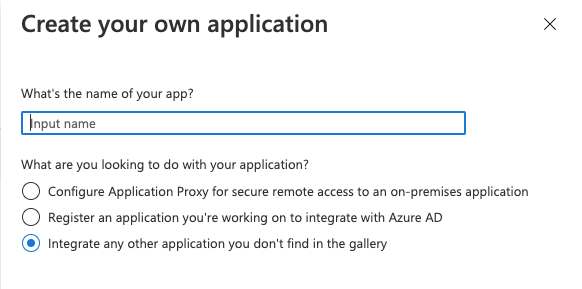
- Under "Create your own application" on the right side:
- Enter "ScaleGrid SAML" for the app name.
- Select "Integrate any other application your don't find in the gallery".
- Click the "Create" button.
- Wait until the application is created.
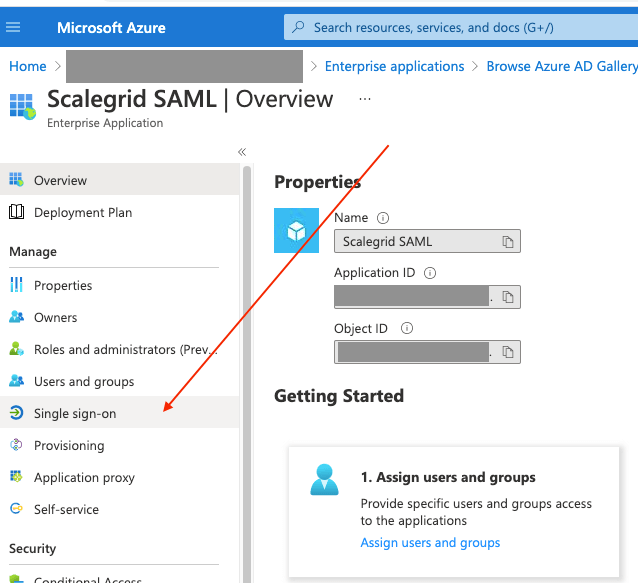
- Go to the newly created "ScaleGrid SAML" application, and click "Single sign-on" from the left menu.
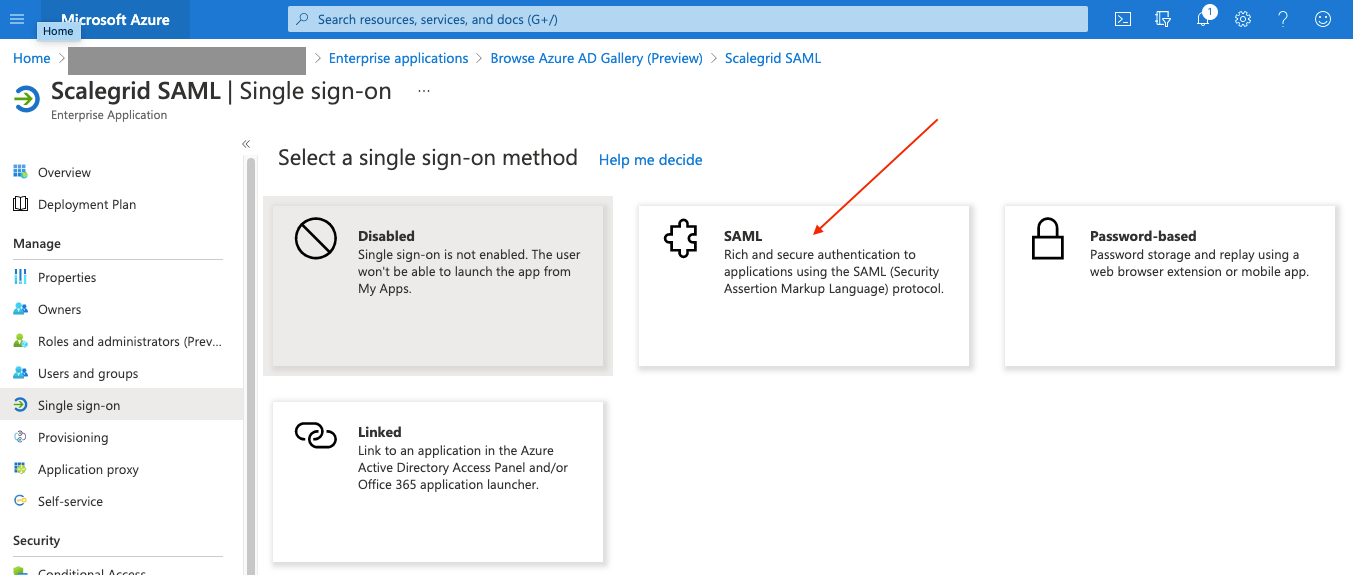
- Click the "SAML" box on the screen.
- You should see the "SAML-based Sign-on" screen.
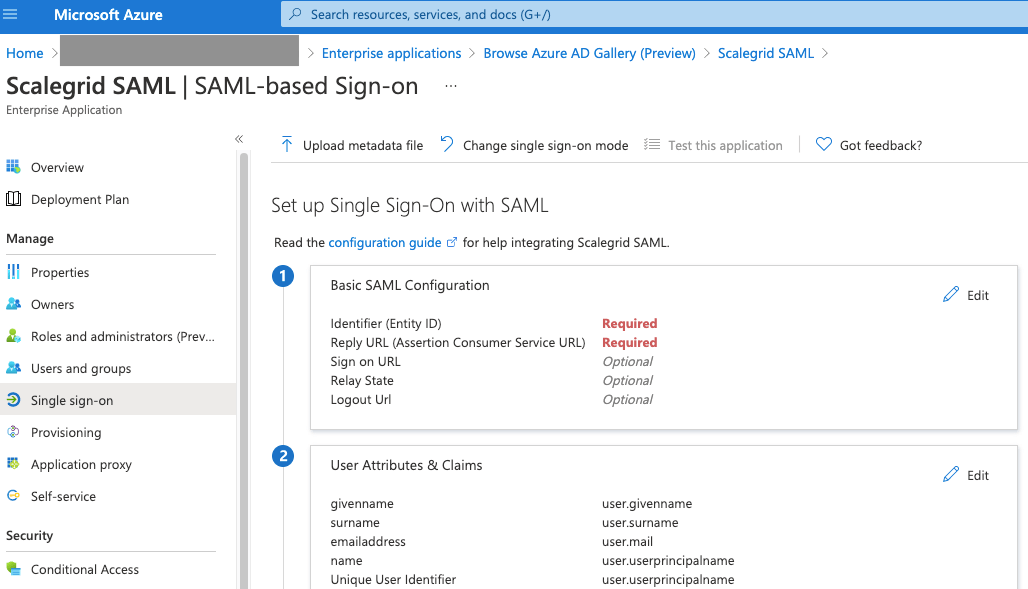
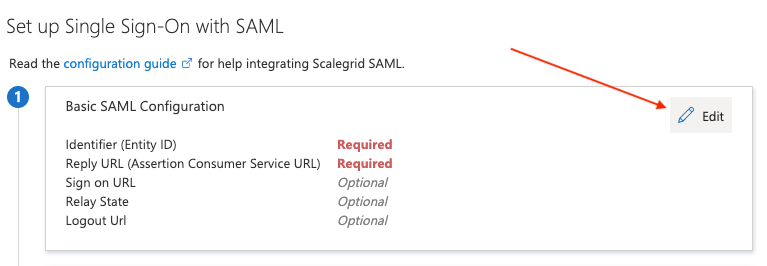
- Click "Edit" from the top right corner of the "1. Basic SAML Configuration" box.
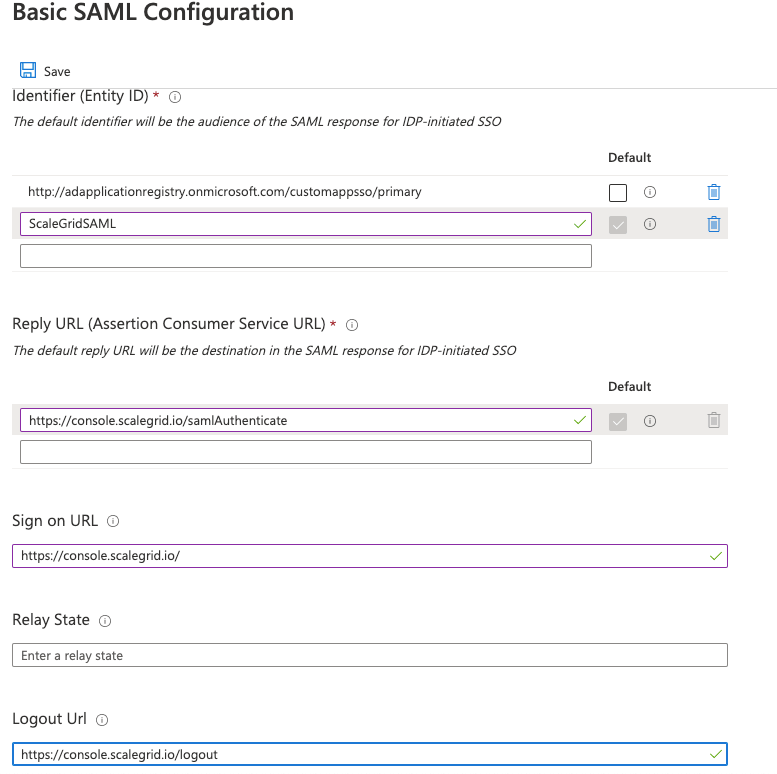
- Under "Basic SAML Configuration" on the right side, enter the following:
- Identifier (Entity ID): ScaleGridSAML
- Reply URL (Assertion Consumer Service URL): https://console.scalegrid.io/samlAuthenticate
- Sign on URL: https://console.scalegrid.io
- Logout Url: https://console.scalegrid.io/logout
- Click the "Save" button.
- Download the "Certificate (Base64)" file from "3. SAML Signing Certificate".

- Copy the following values from "4. Set up Scalegrid SAML":
- Login URL - Eg. http://login.microsoftonline.com/aabbcc/saml2
- Azure AD Identifier - Eg. https://sts.windows.net/aabbcc/
- Logout URL - Eg. http://login.microsoftonline.com/aabbcc/saml2

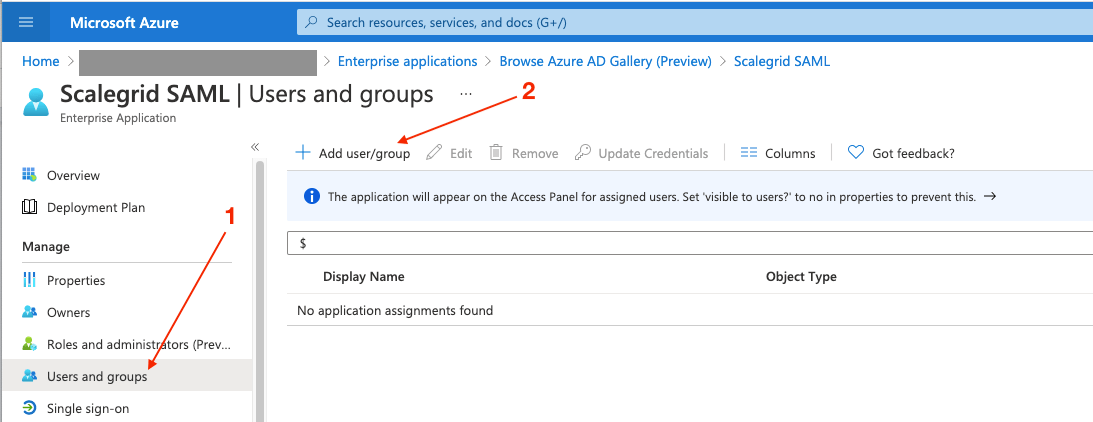
- Click "Users and groups" from the left menu.
- Click "Add user/group"
- Click "None Selected" under Users.
- Select the users you wish to allow access to your ScaleGrid account, then click the "Select" button.
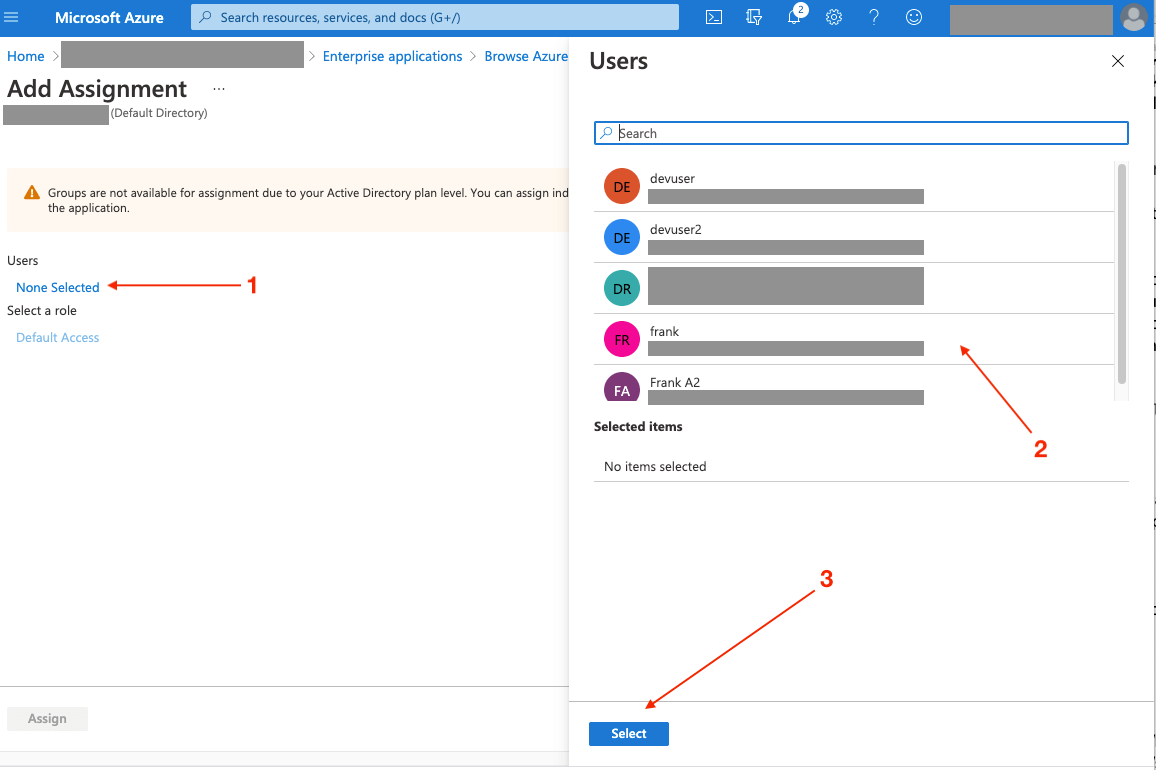
- Click the "Assign" button.
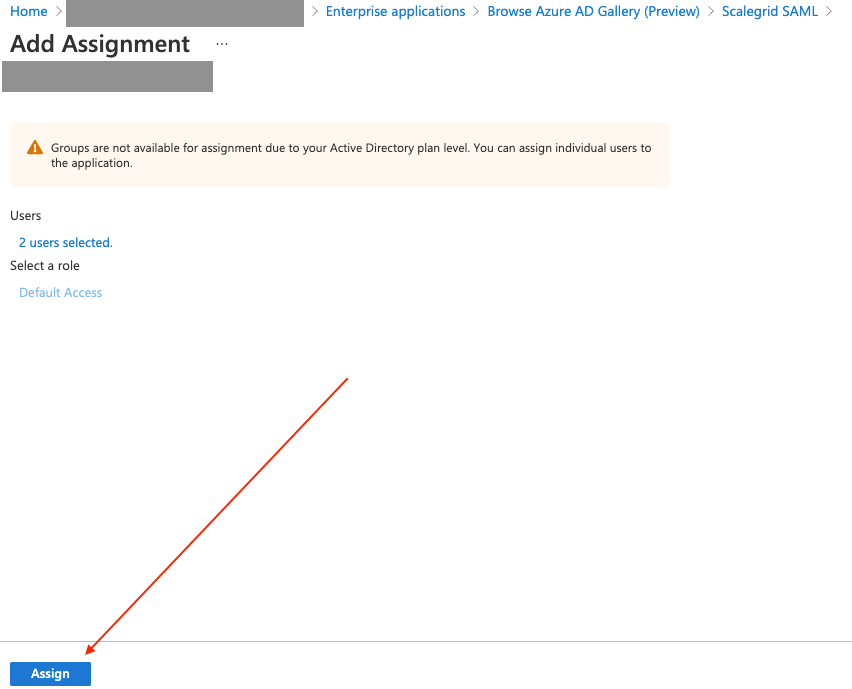
- You should now see all assigned users on the "Users and groups" screen.

- Send ScaleGrid the following information:
- Login URL (from step 15)
- Azure AD Identifier (from step 15)
- Logout URL (from step 15)
- The Certificate (Base64) file (from step 14)
Once you're through these steps, head back to our SSO - SAML Setup page to finalize your secure login setup.
Updated 9 months ago
