SSO - JumpCloud SAML Configuration
Follow these simple steps to set up JumpCloud SAML for your ScaleGrid DBaaS account.
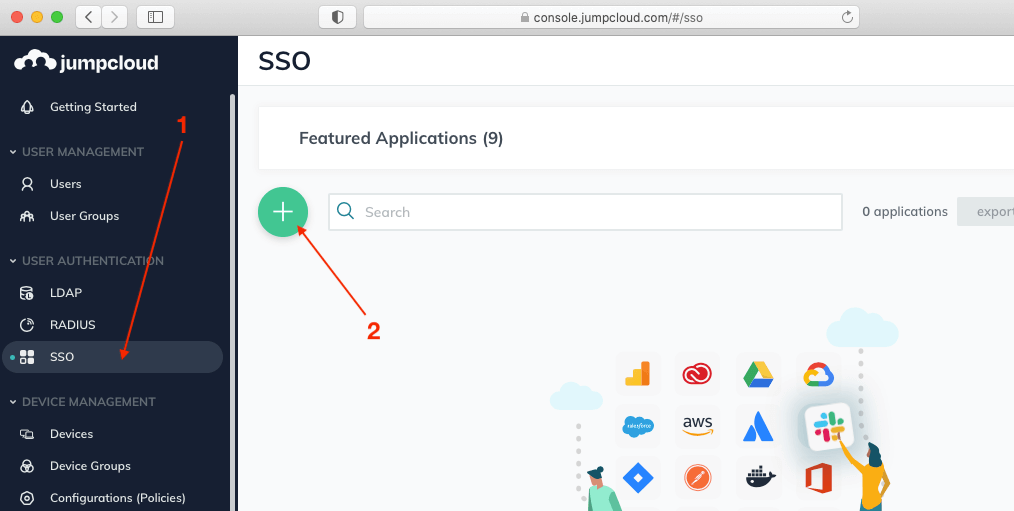
- Login to JumpCloud, then click “SSO” from the left menu and click the “+” button to add a new custom SAML application.
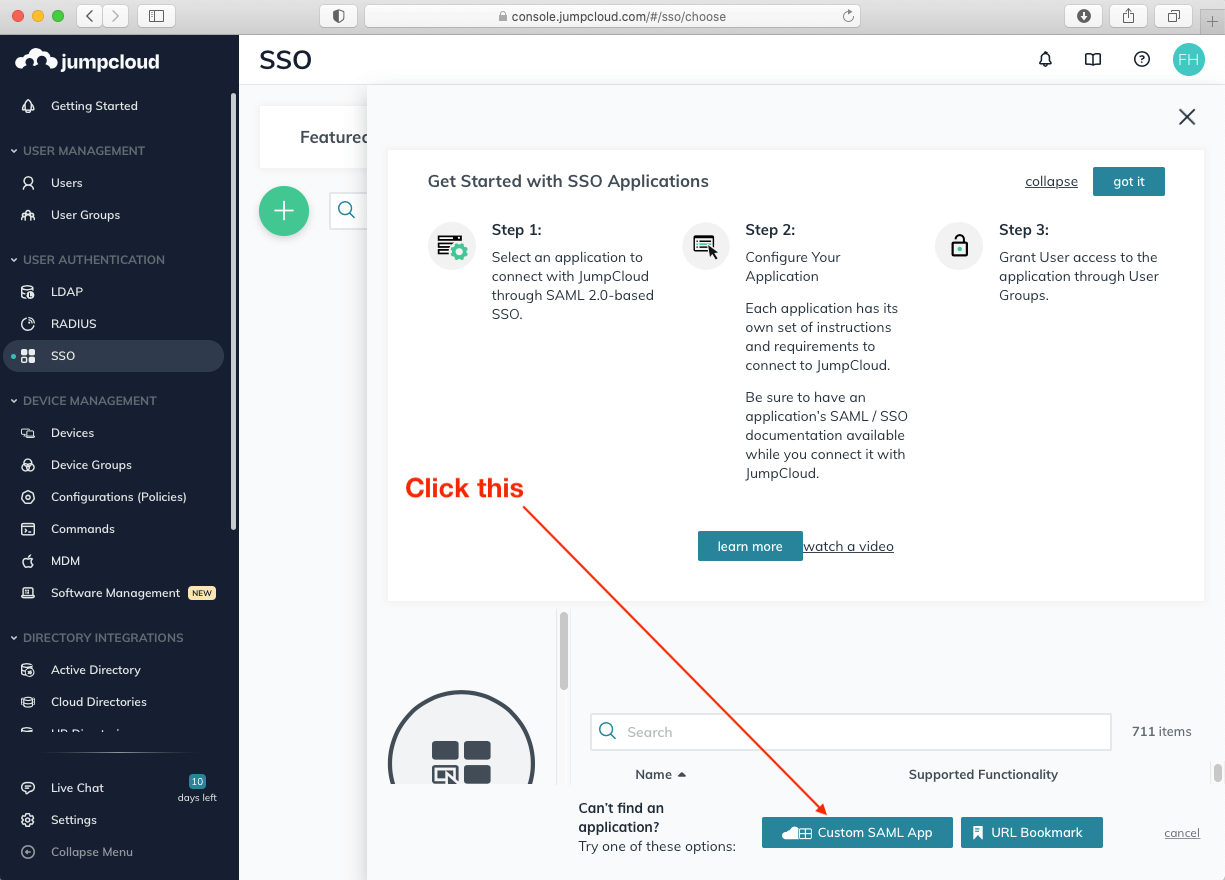
- Click the “Custom SAML App” button.
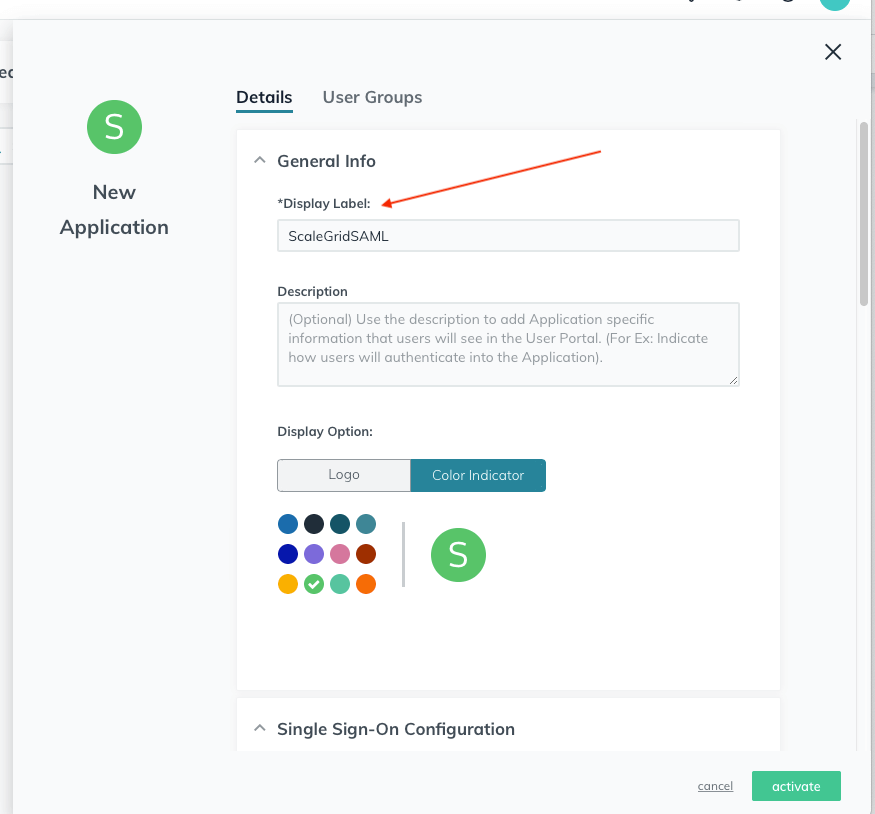
- Under the “Details” tab, "General Info" section, enter a name for “Display Label”.
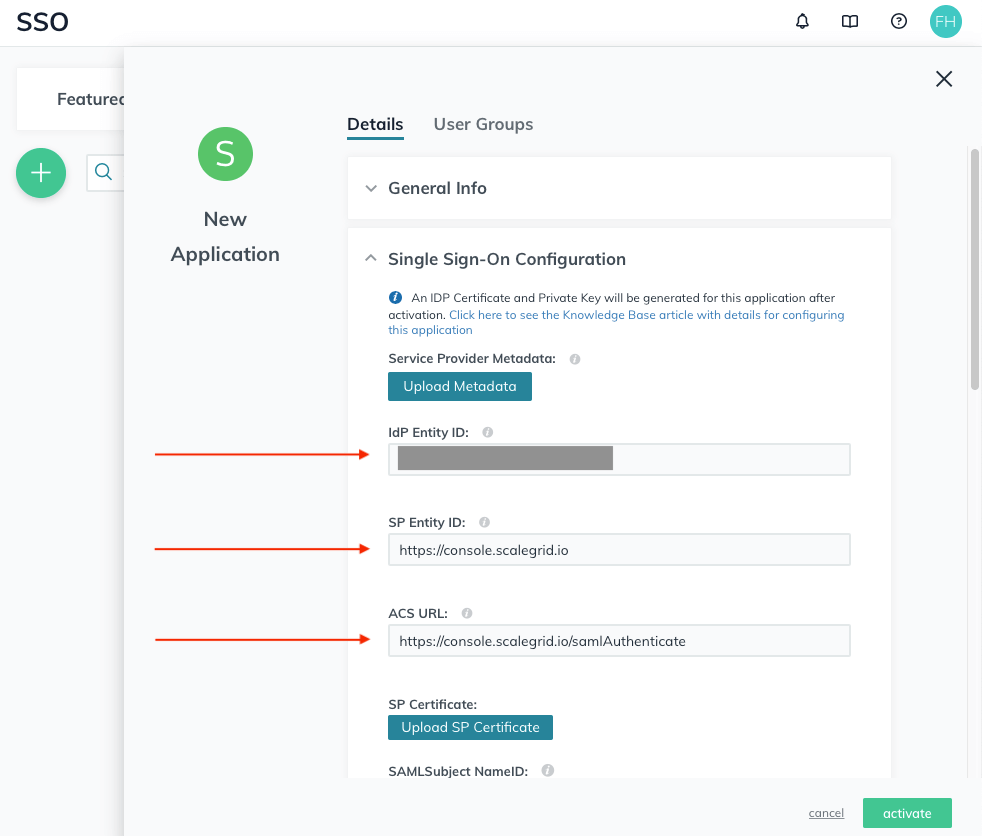
- Under “Single Sign-On Configuration”, enter the following:
- Idp Entity ID: (any name ie. your domain)
- This is the unique, case-sensitive identifier used by JumpCloud for this service provider.
- SP Entity ID: https://console.scalegrid.io
- ACS URL: https://console.scalegrid.io/samlAuthenticate
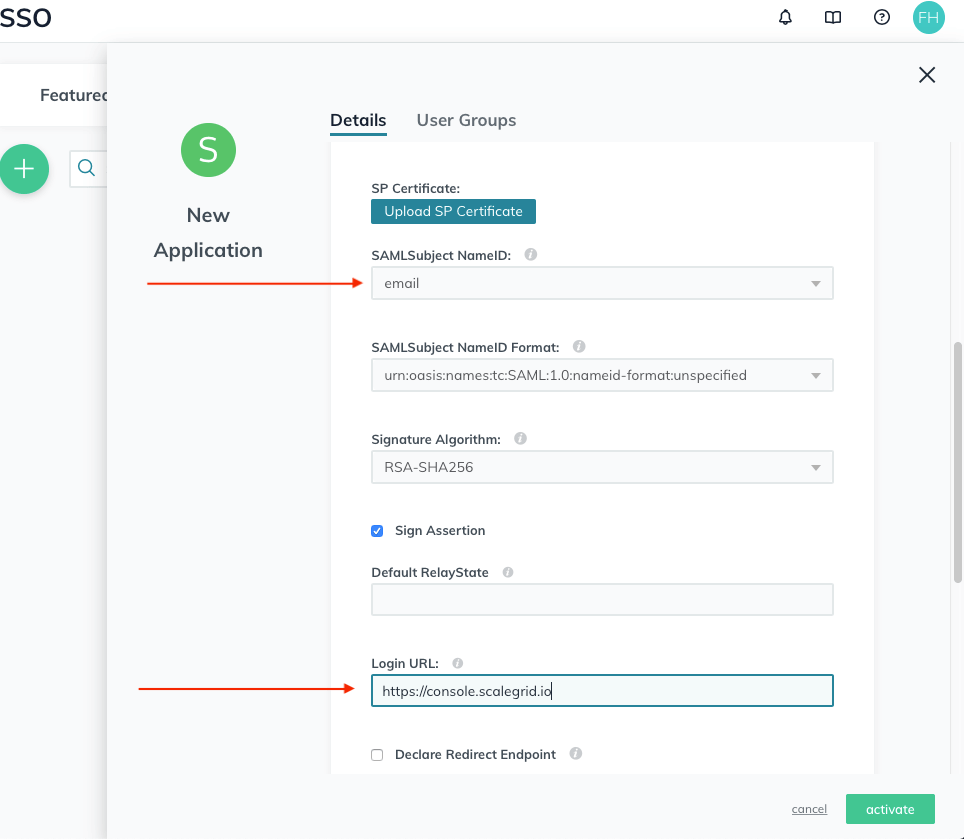
- SAMLSubject NameID: email
- SAMLSubject NameID format: urn:oasis:names:tc:SAML:1.0:nameid-format:unspecified
- Signature Algorithm: RSA-SHA256
- Sign Assertion: Checked
- Default RelayState: (leave empty)
- Login URL: https://console.scalegrid.io
- Idp Entity ID: (any name ie. your domain)
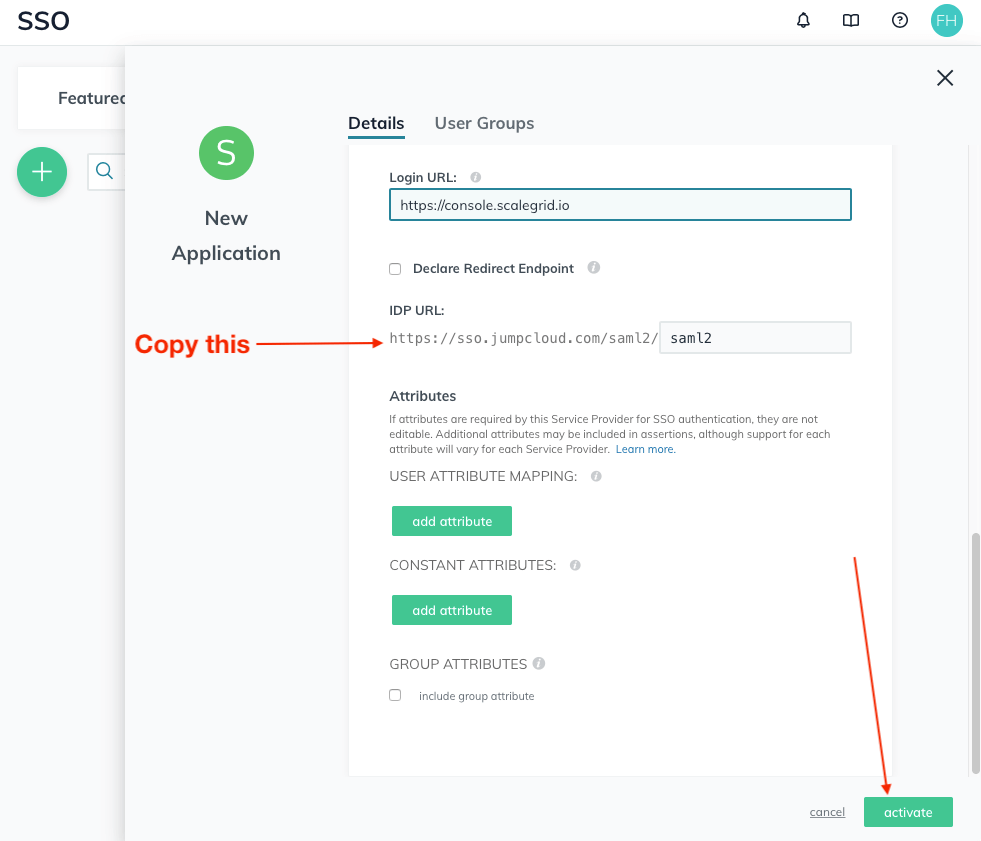
- Copy the “IDP URL”, and click the “activate” button.
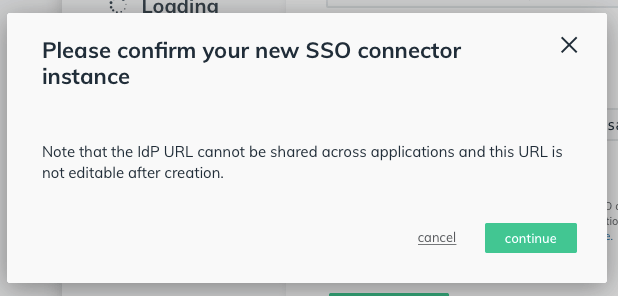
- Click the “continue” button on the confirm screen.
- Download the certificate.

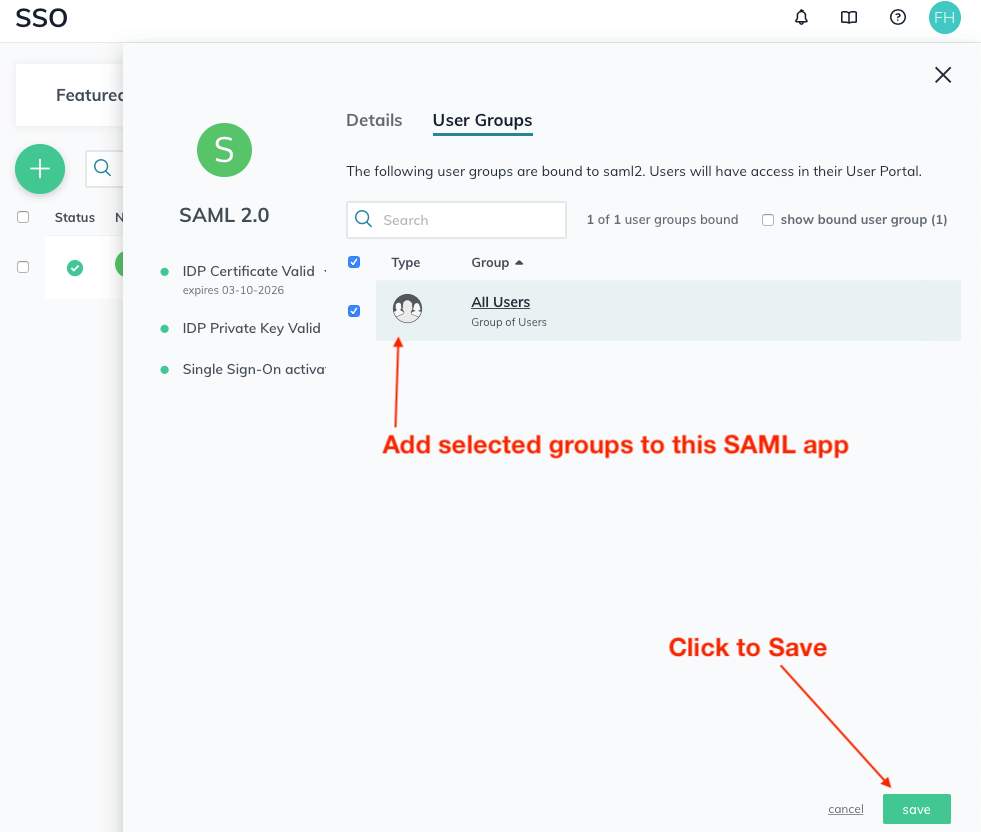
- Click the newly added SAML app and add users.

- Go to the “User Groups” tab to add your group, then click the “save” button.
When you're done, send [email protected] the following information:
- The “IdP Entity ID” from step 4a.
- The “IDP URL” from step 5.
- The Certificate from step 7.
Once you're through these steps, head back to our SSO - SAML Setup page to finalize your secure login setup.
Updated 8 months ago
